> ## Documentation Index
> Fetch the complete documentation index at: https://help.stiddle.com/llms.txt
> Use this file to discover all available pages before exploring further.
# Stiddle Zapier Connector
> Learn how to use Stiddle's Zapier connector.
This is commonly used for sending events to Stiddle for attribution and reporting. For example, sending Facebook Lead Forms, Calendly booking, or CallRail tracking events to Stiddle.
This is commonly used for syncing Stiddle profiles and attribution data out of Stiddle for audience syncing, conversion APIs, and CRM syncing.
## Overview & Capabilities
Stiddle's integration with Zapier allows for a simple and secure way to connect, track, and sync customer events and profiles from third-party integrations to and from Stiddle.
The Zapier integration allows you to trigger events and send actions across 1,000s of apps and integrations.
## Connecting Zapier
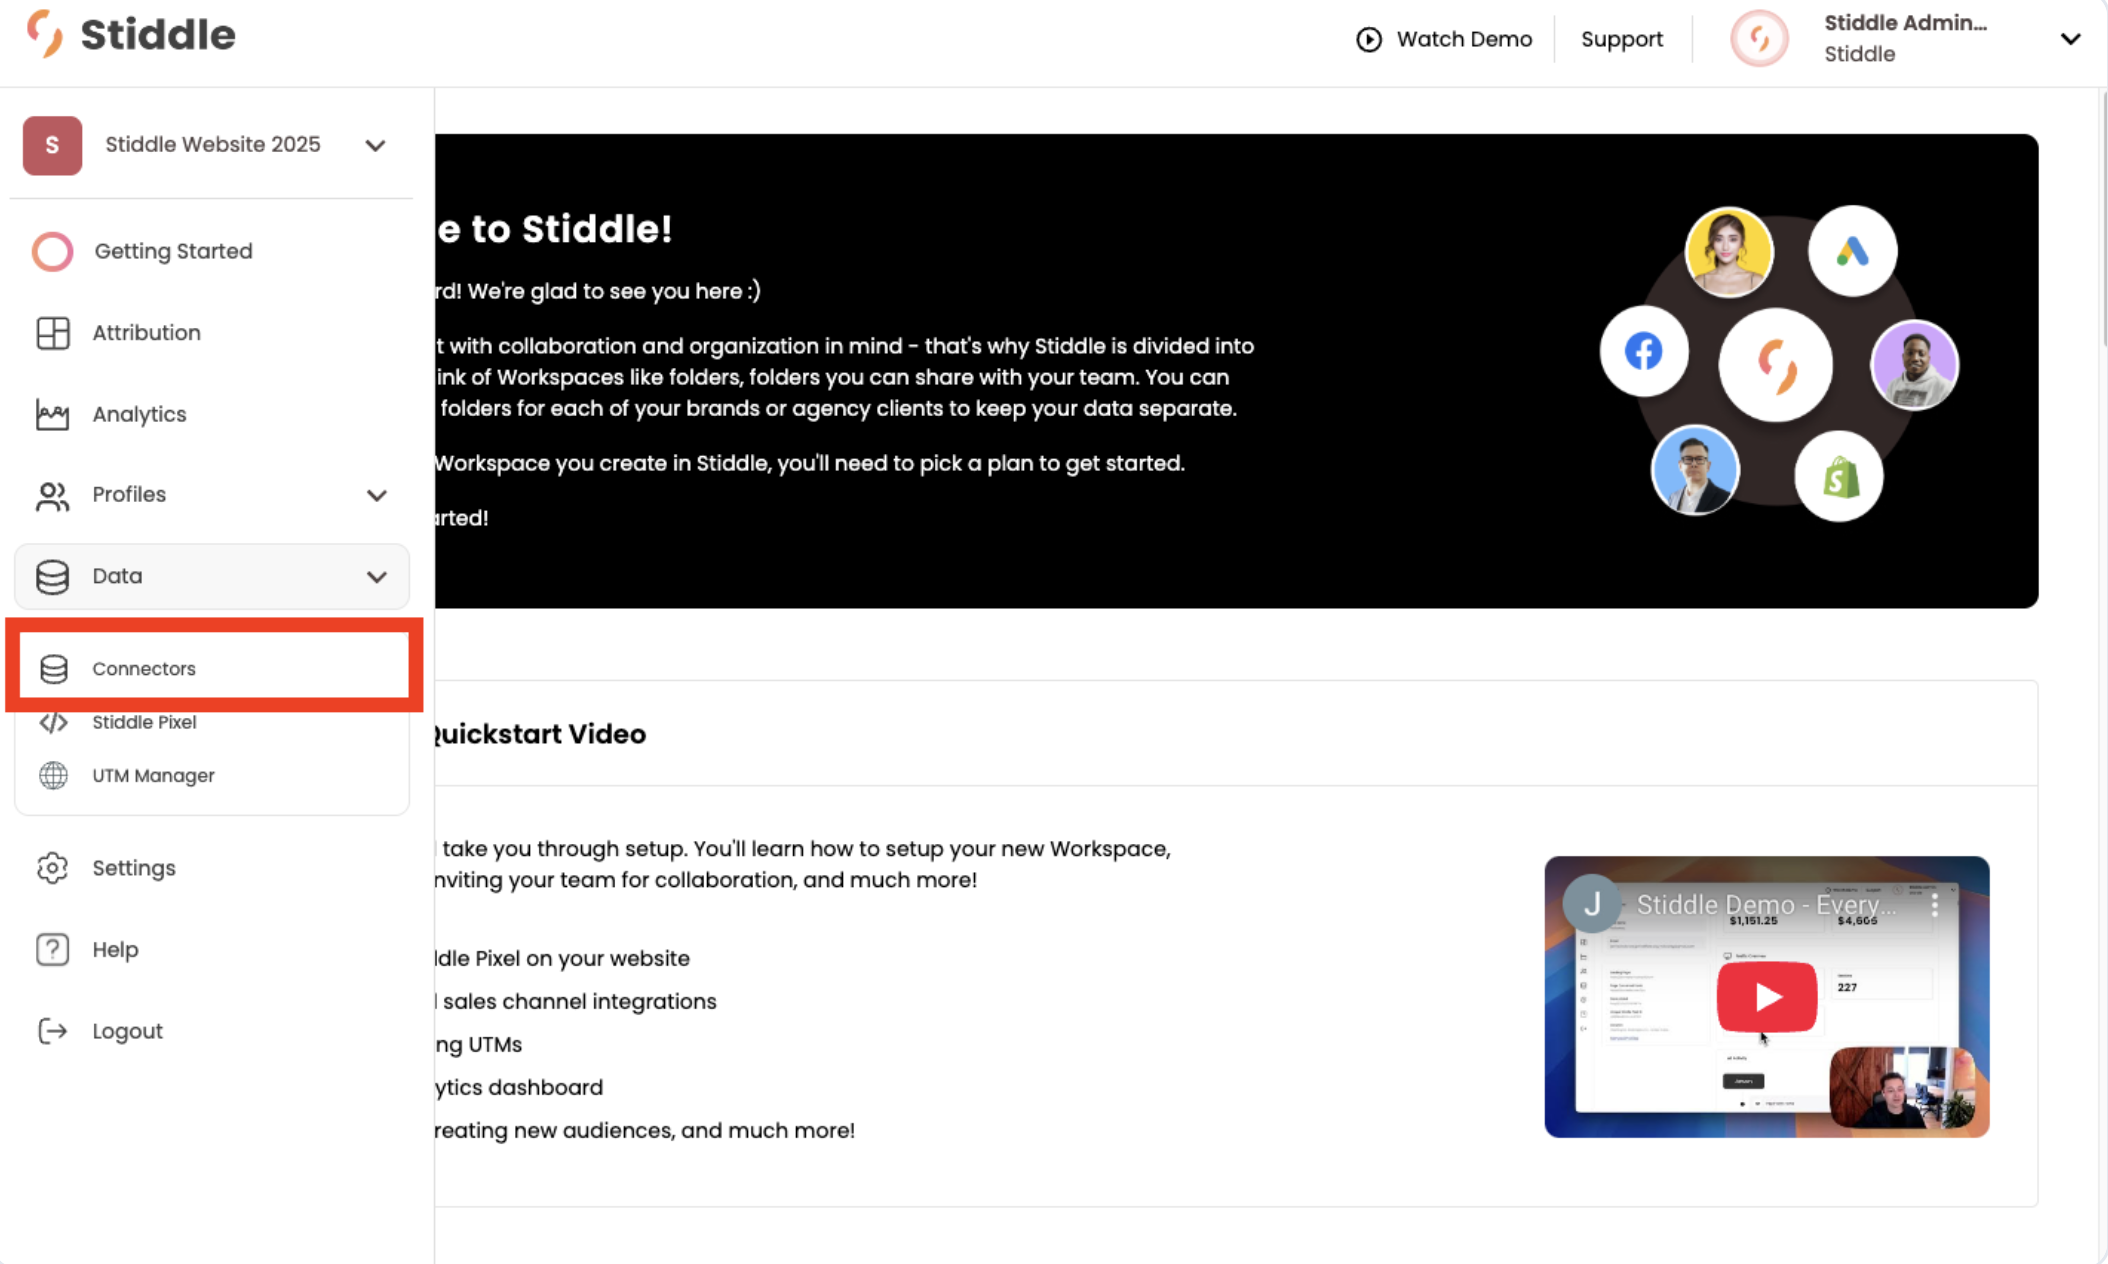
First, log into your Stiddle account and select the workspace you'd like to connect Zapier to. Then, hover over the left side navigation, hover over "Data", and select "Connectors".
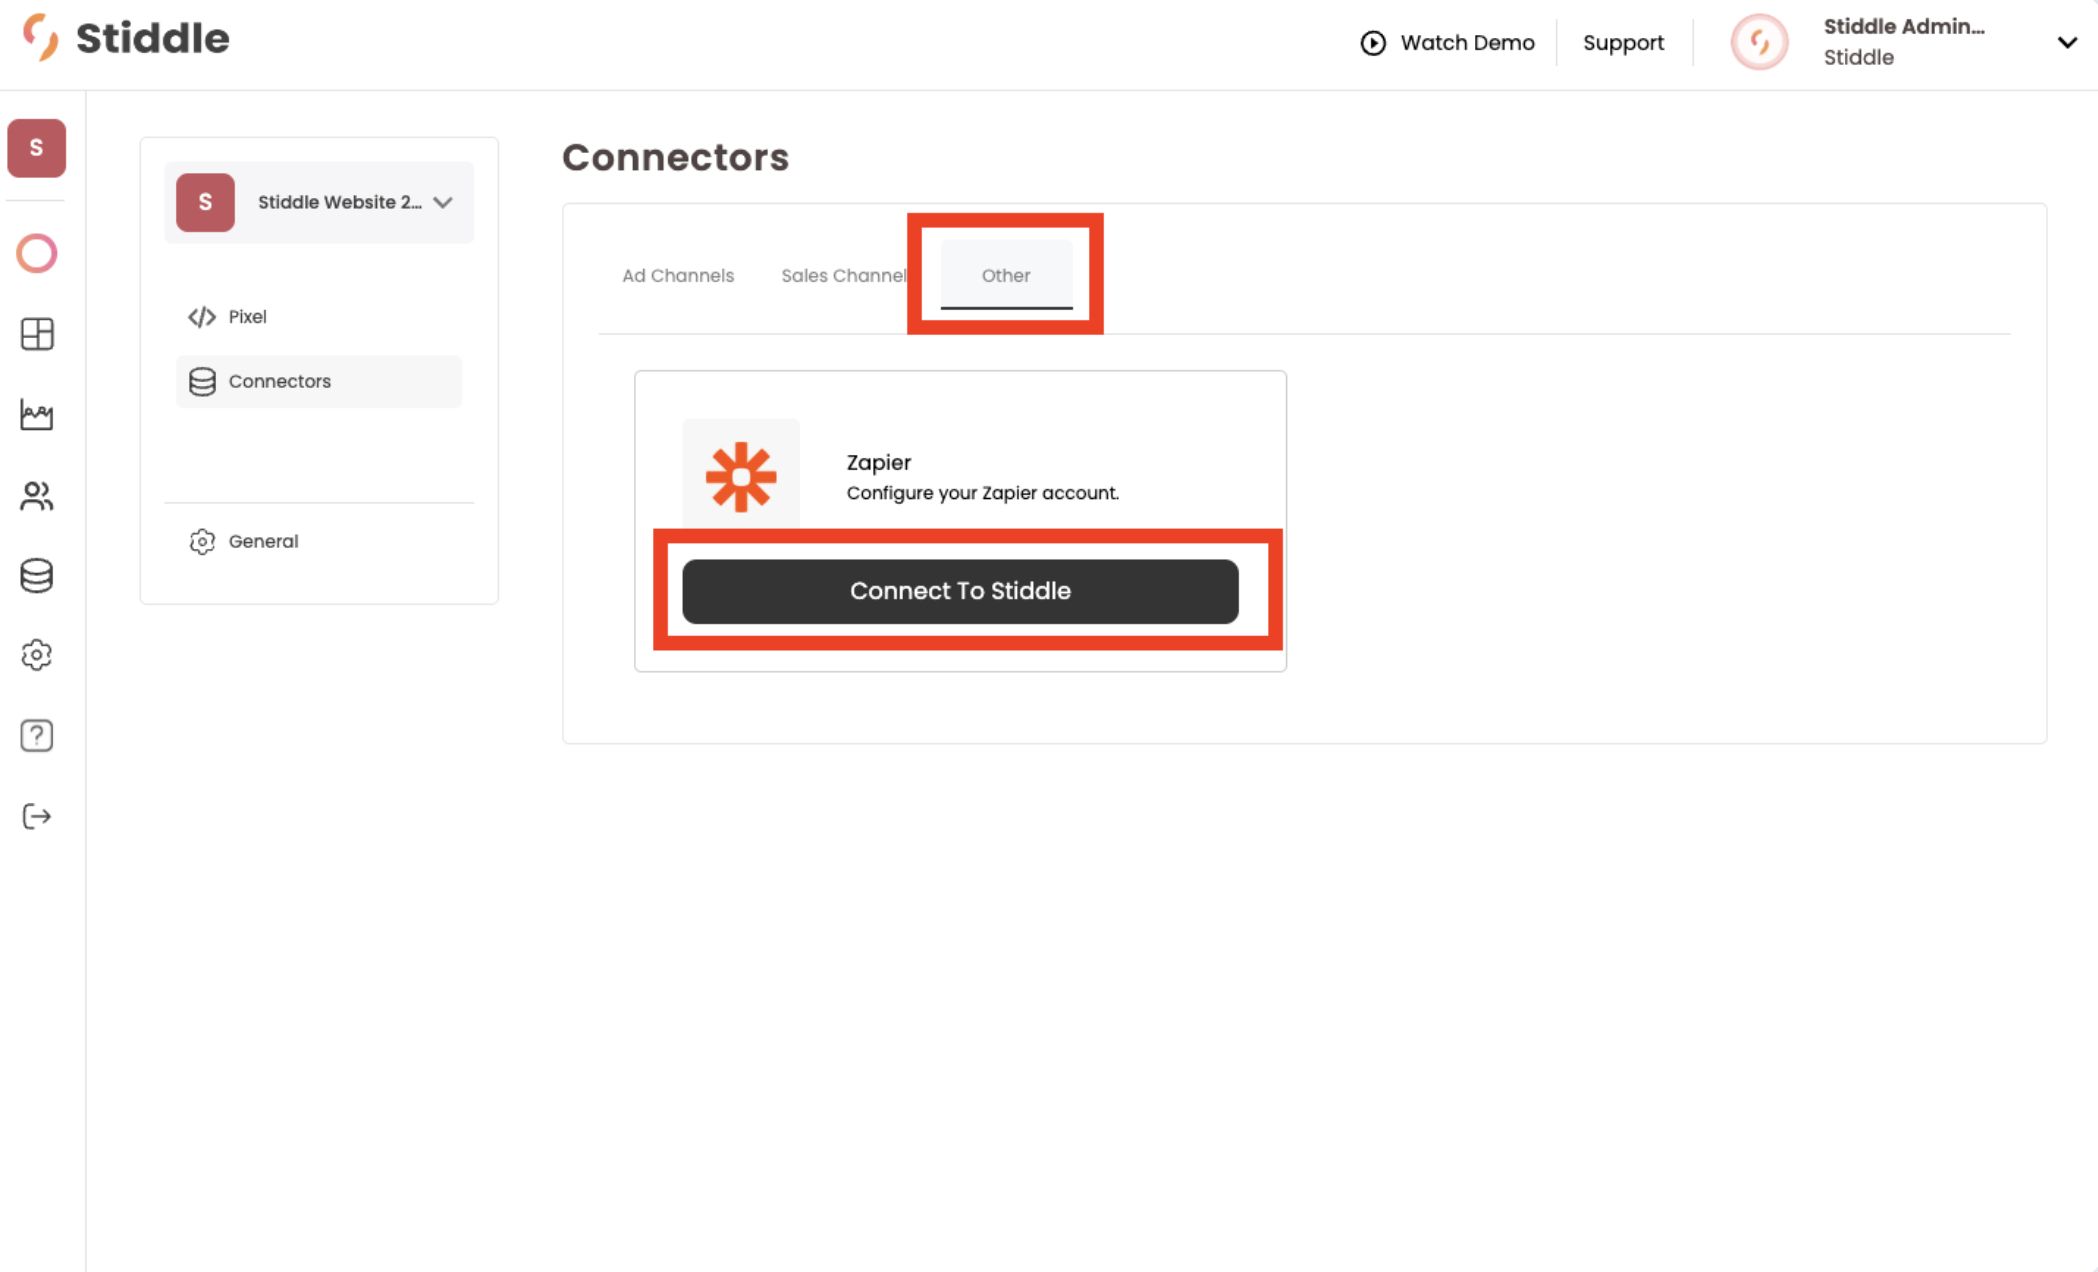
 Once on the connector page, select the "Other" tab, then select the "Connect to Stiddle" button next to the Zapier logo.
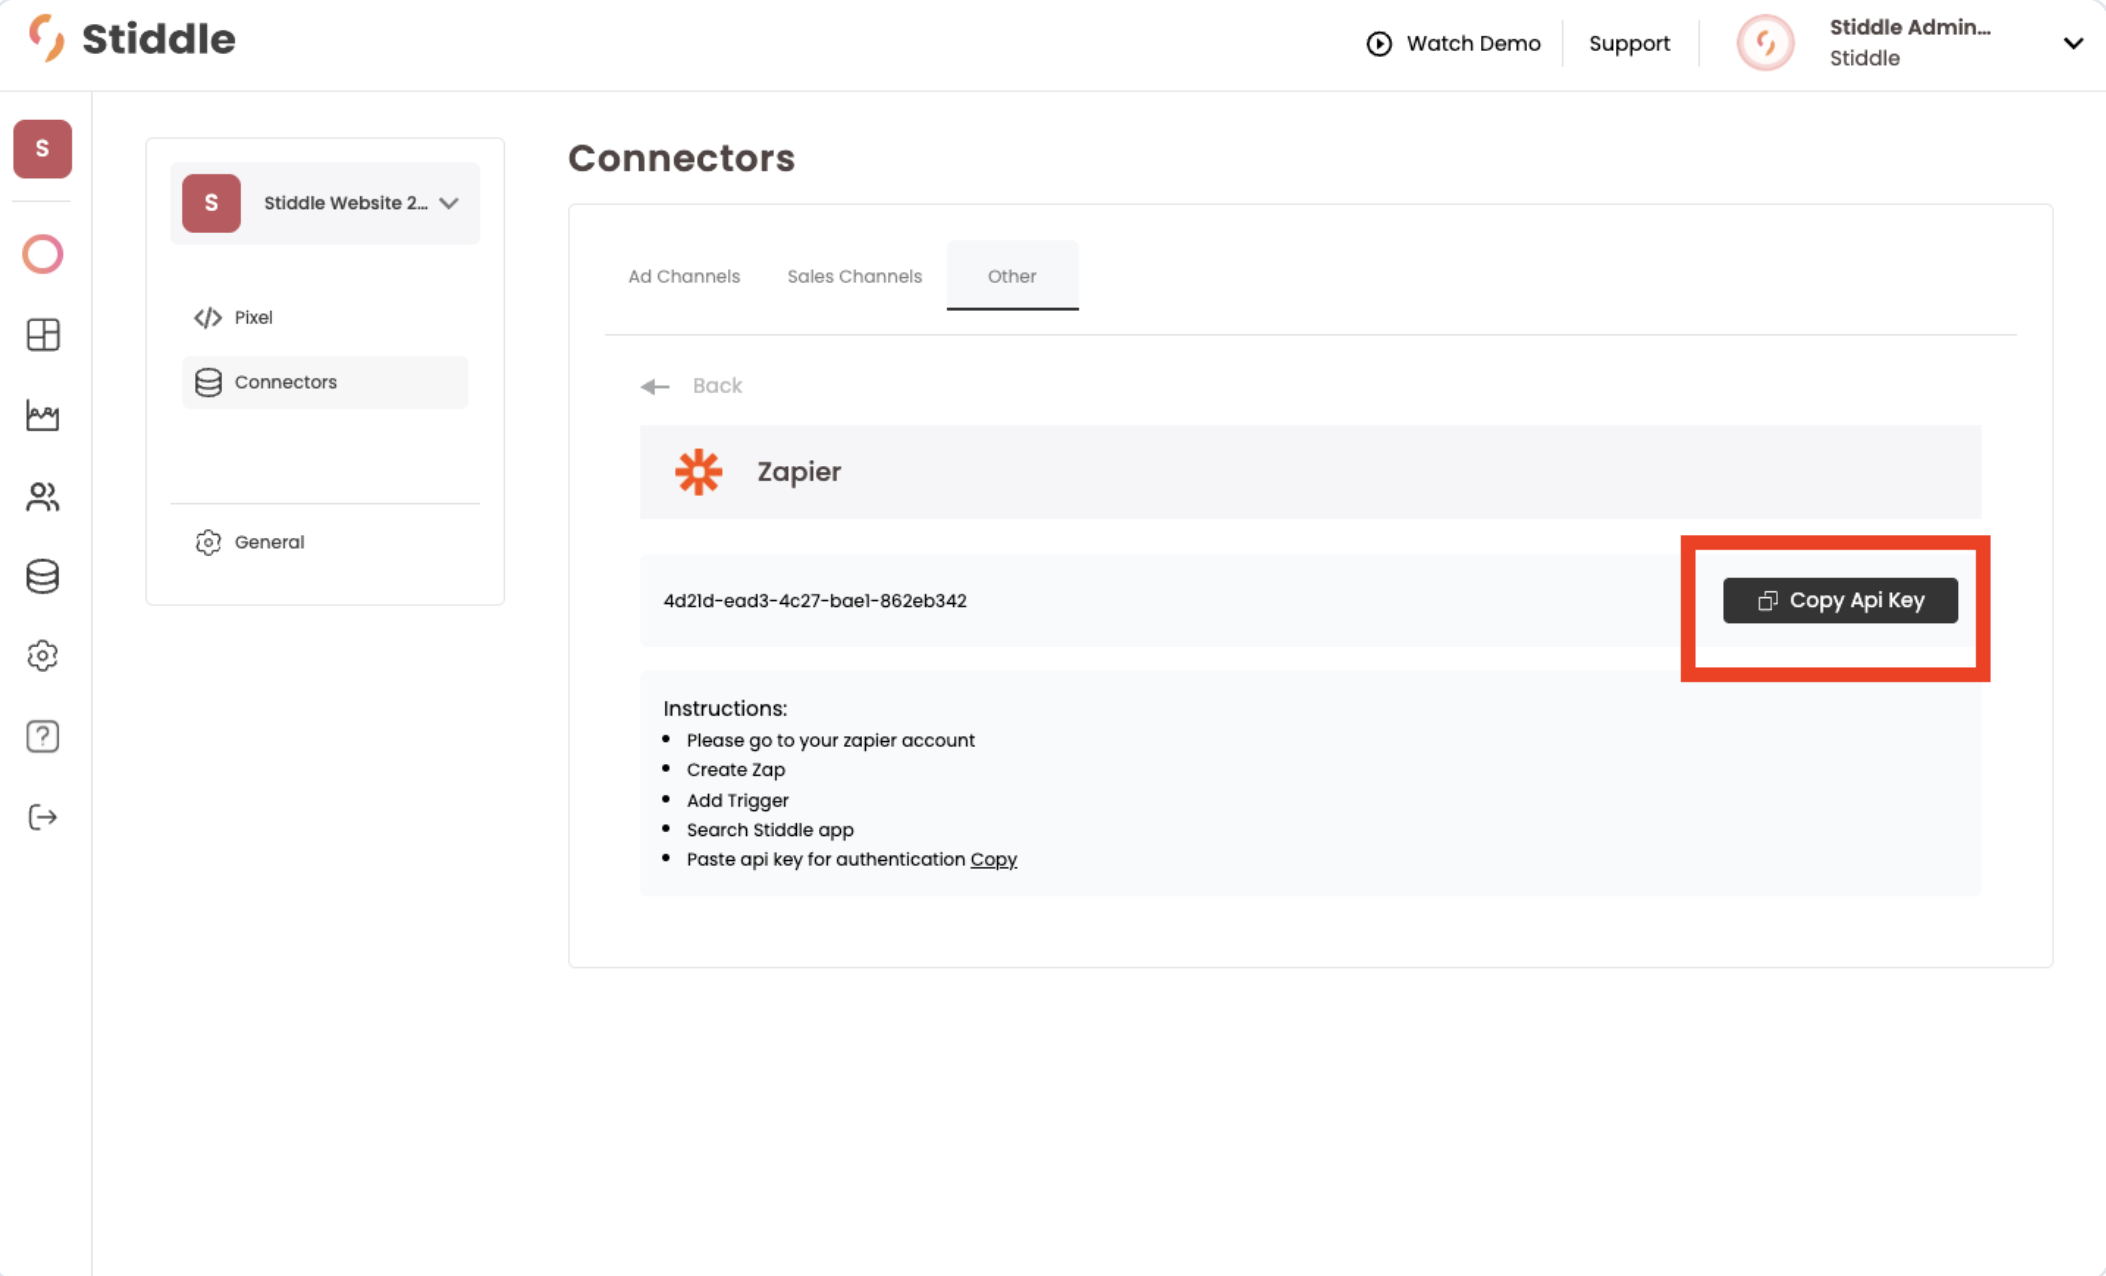
 From here, simply select the "Copy API Key" button. This will copy the key to your clipboard.
 ### Creating Your First Zap - Trigger
Now it's time to connect Stiddle and create your first zap in Zapier.
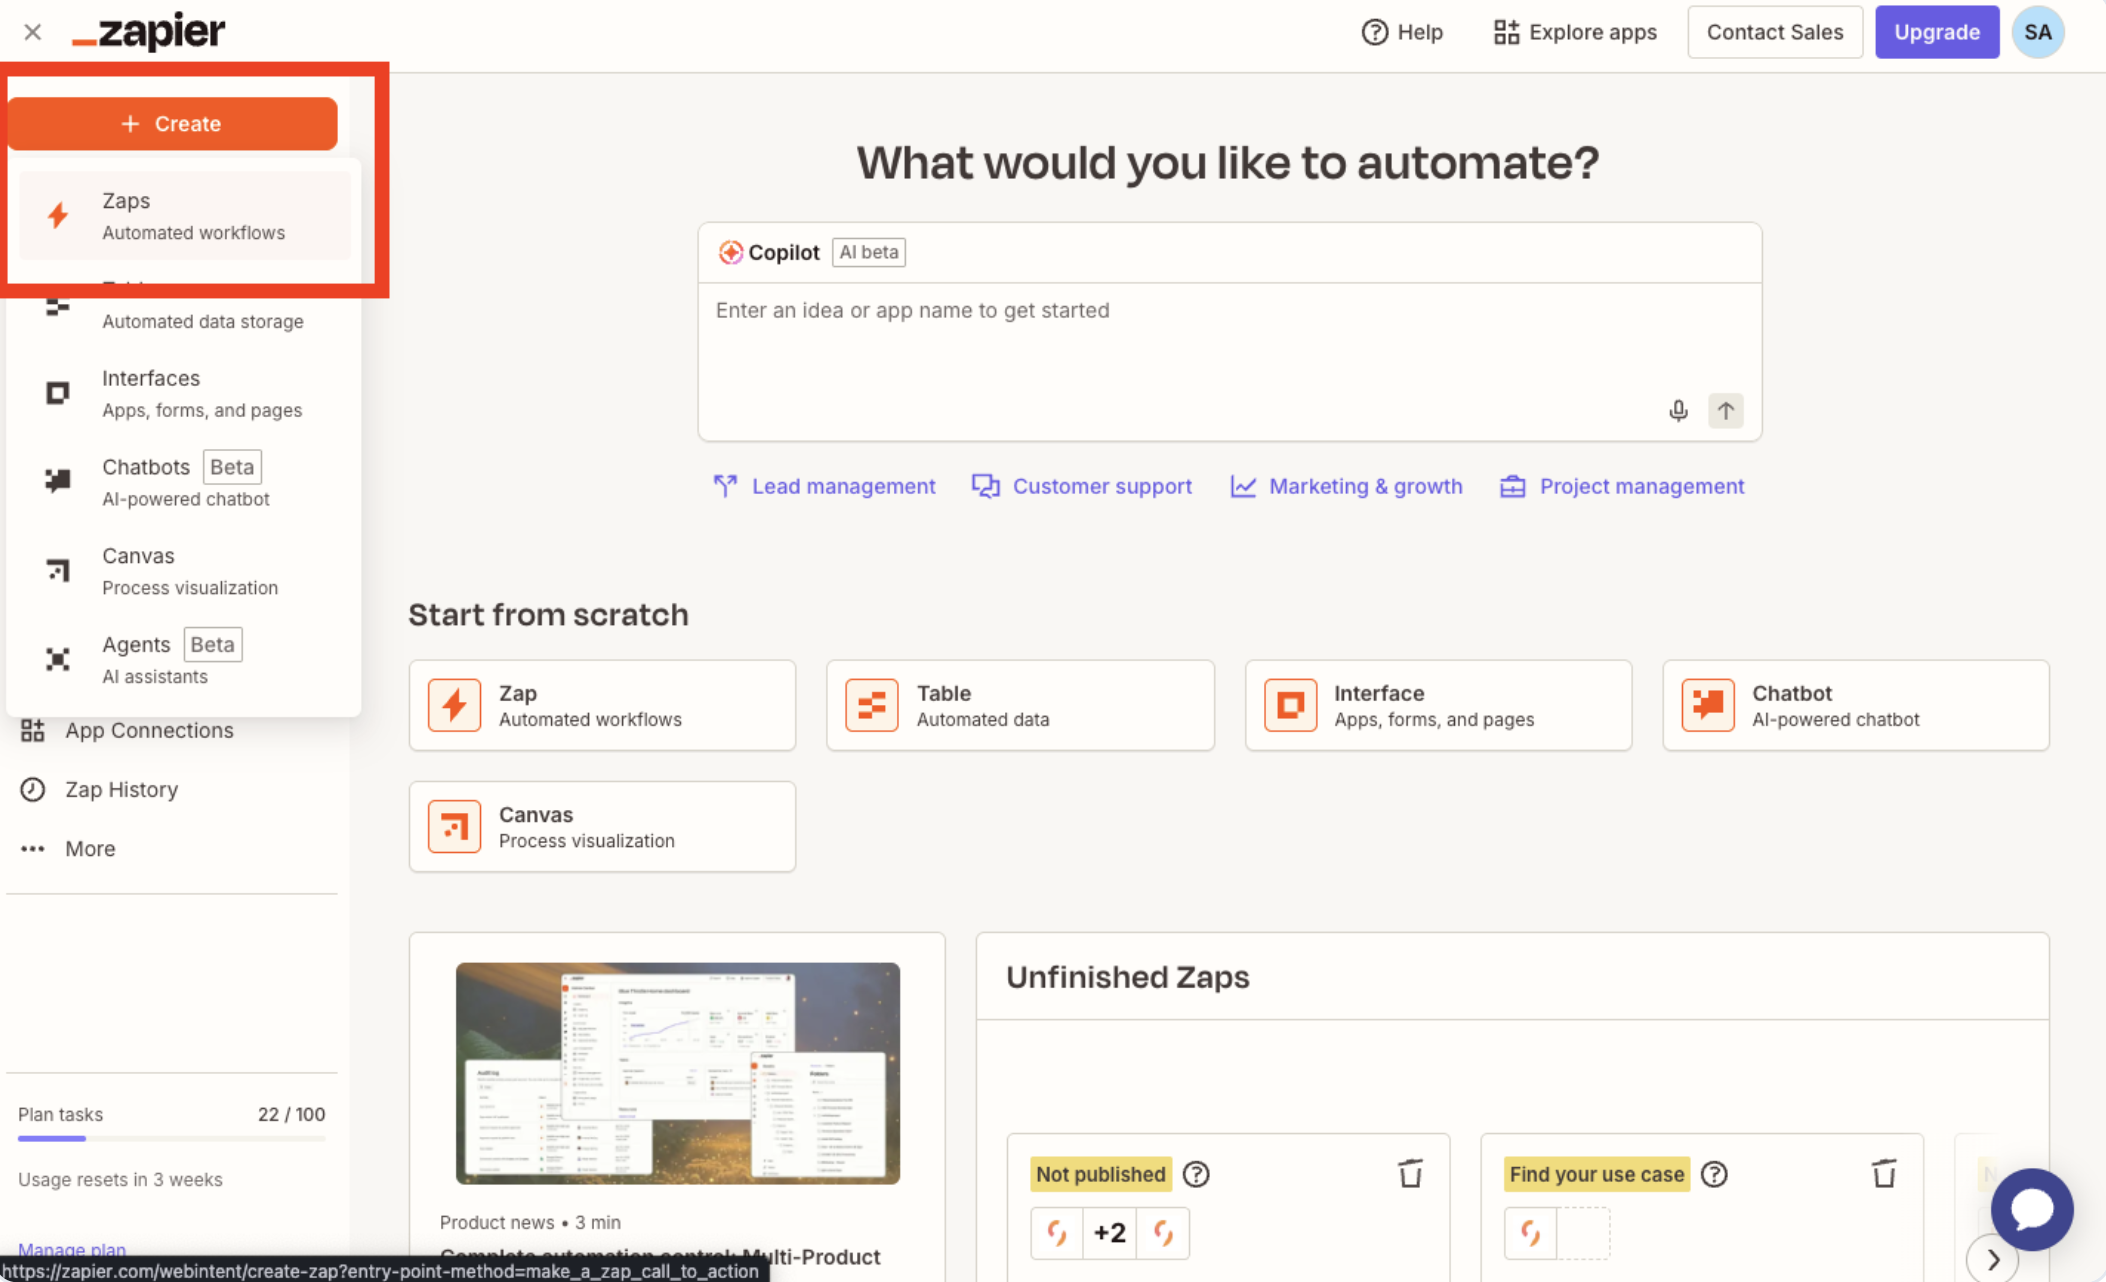
First, login to your Zapier account, select the "Create" button in the left-hand navigation, then select "Zaps".
### Creating Your First Zap - Trigger
Now it's time to connect Stiddle and create your first zap in Zapier.
First, login to your Zapier account, select the "Create" button in the left-hand navigation, then select "Zaps".
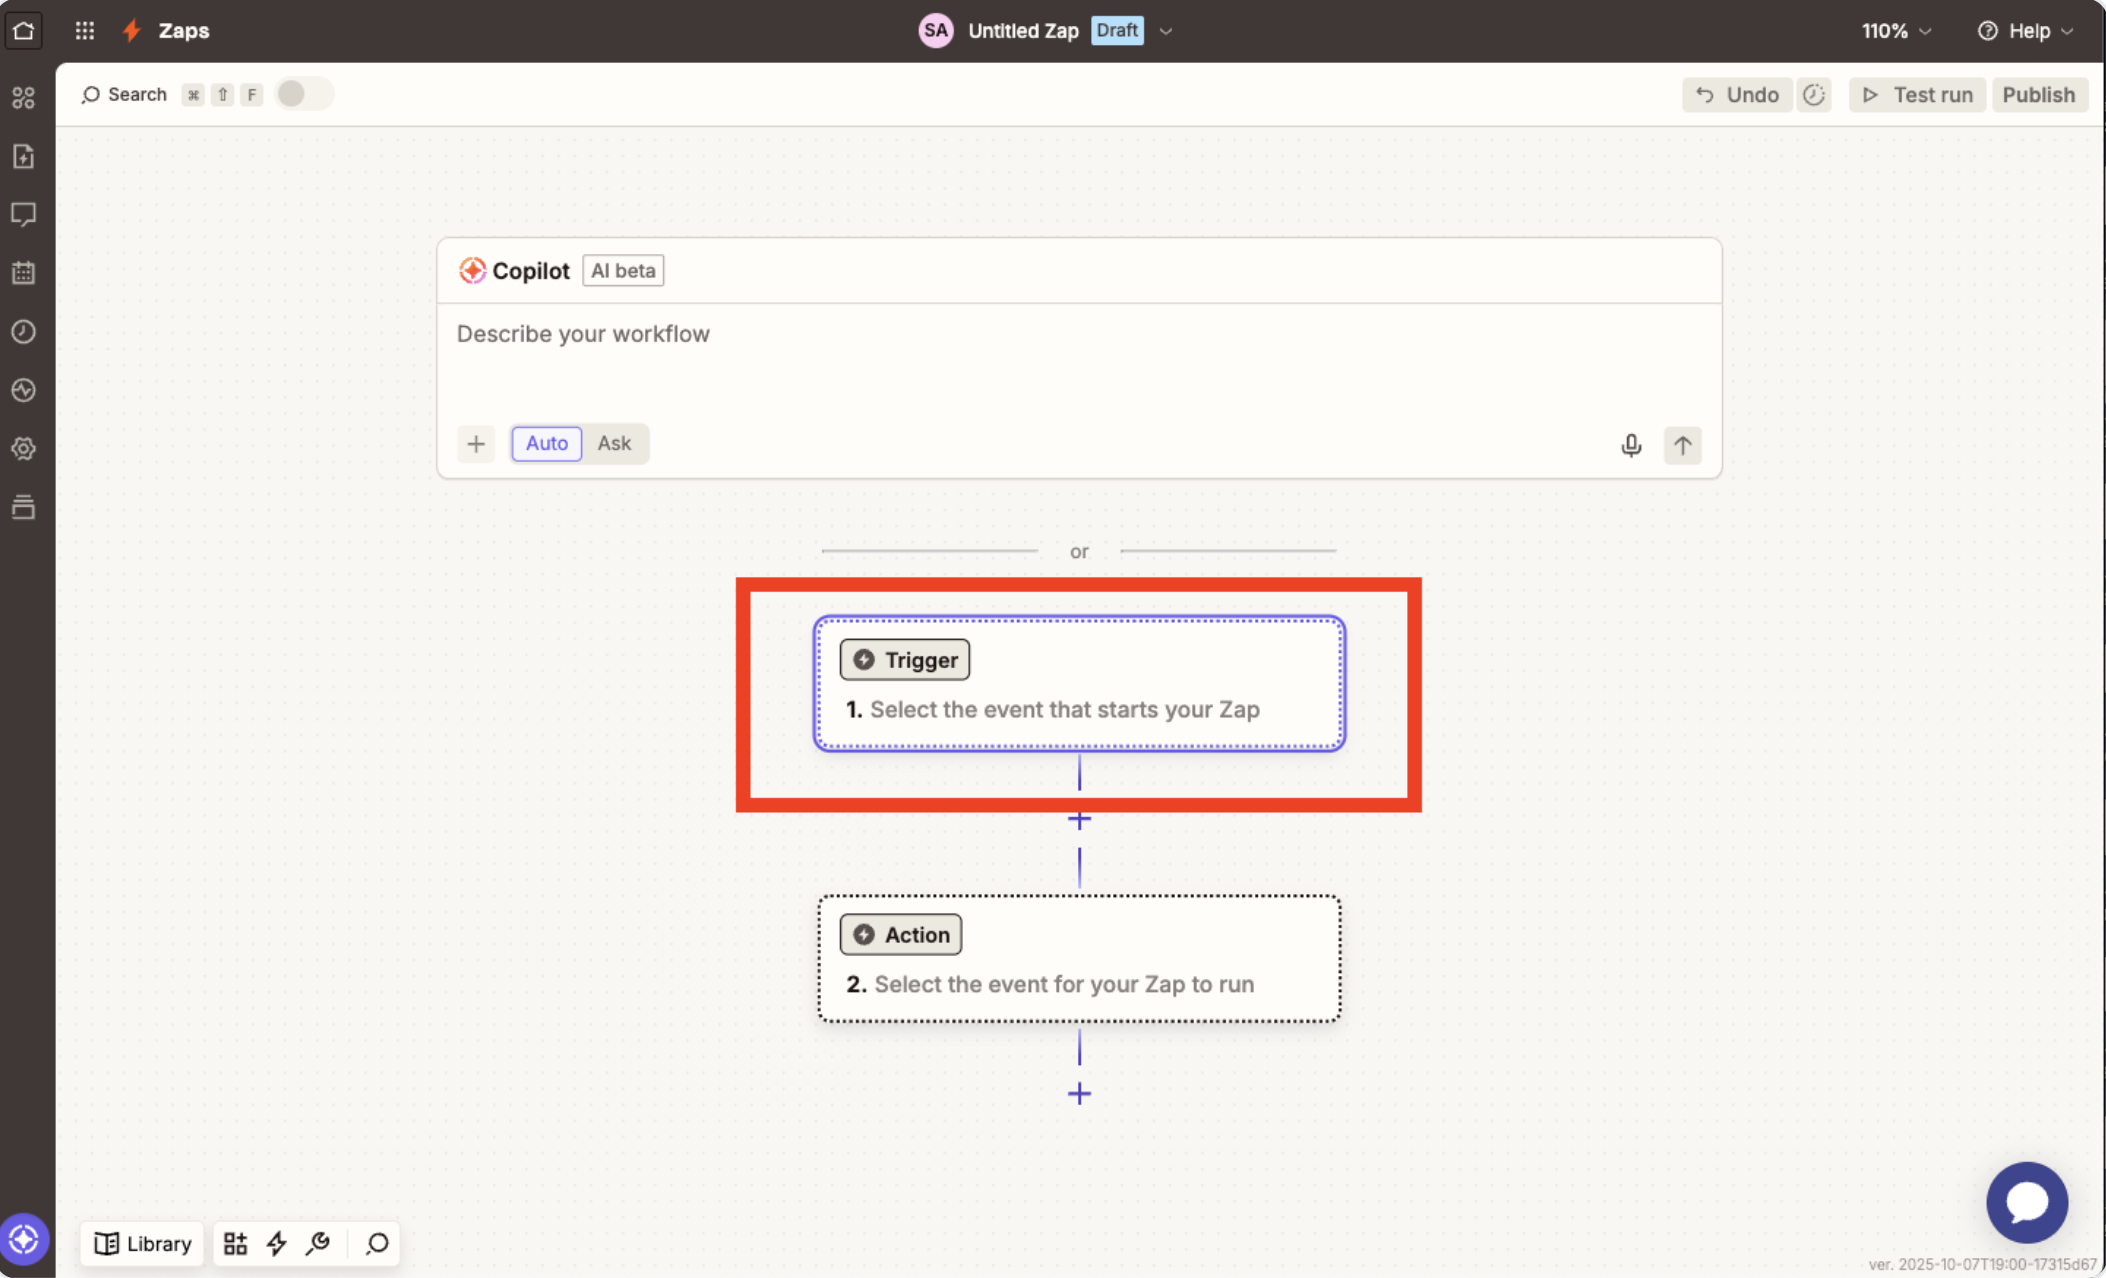
 Once you land on the new zap canvas, select the first "Trigger".
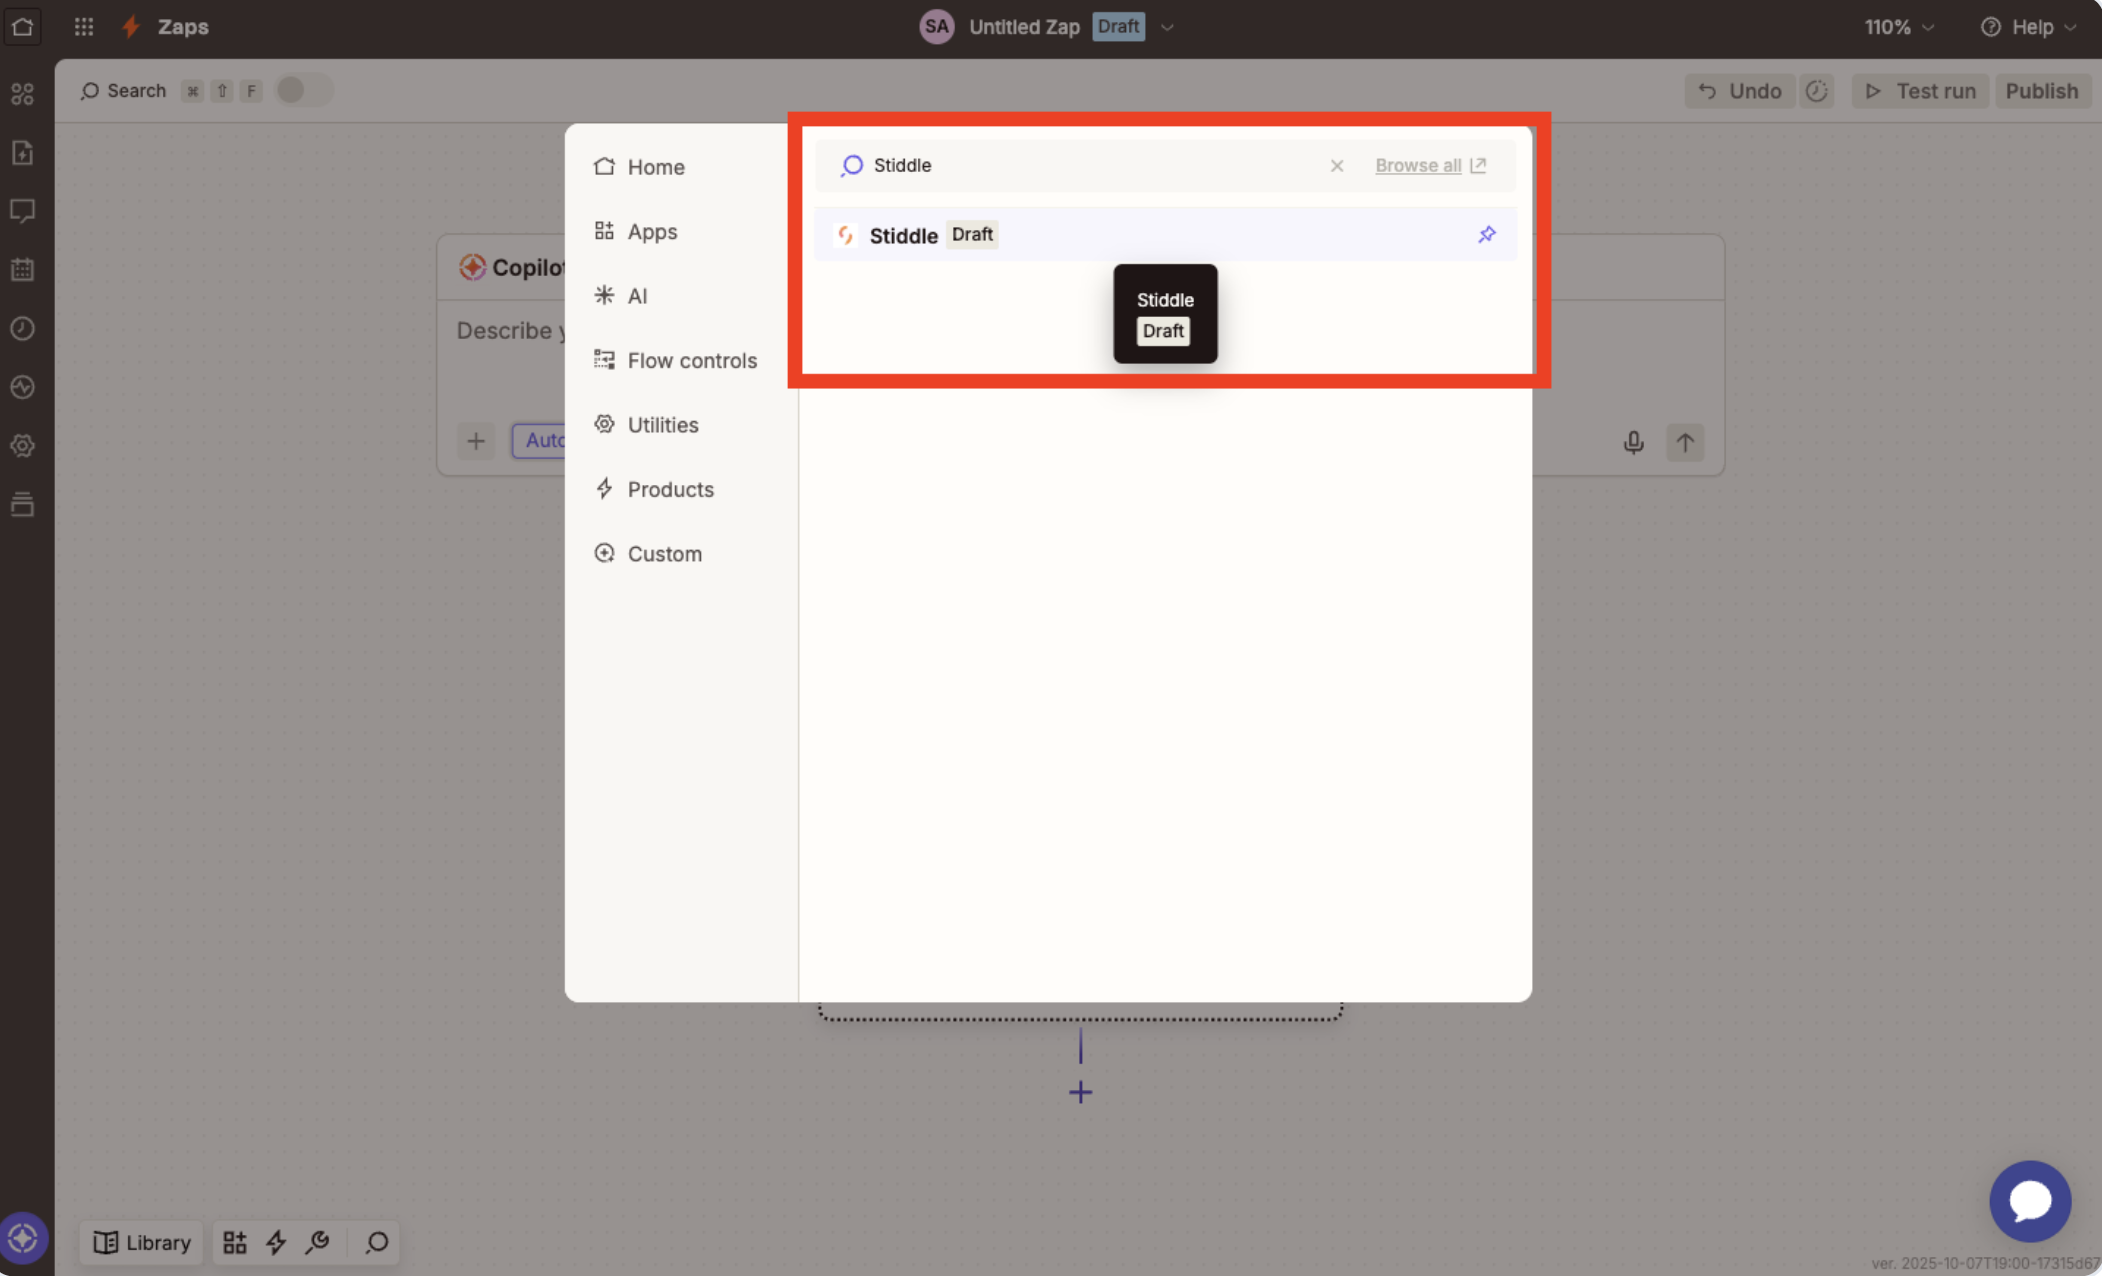
 In the popup, type "Stiddle". Then select.
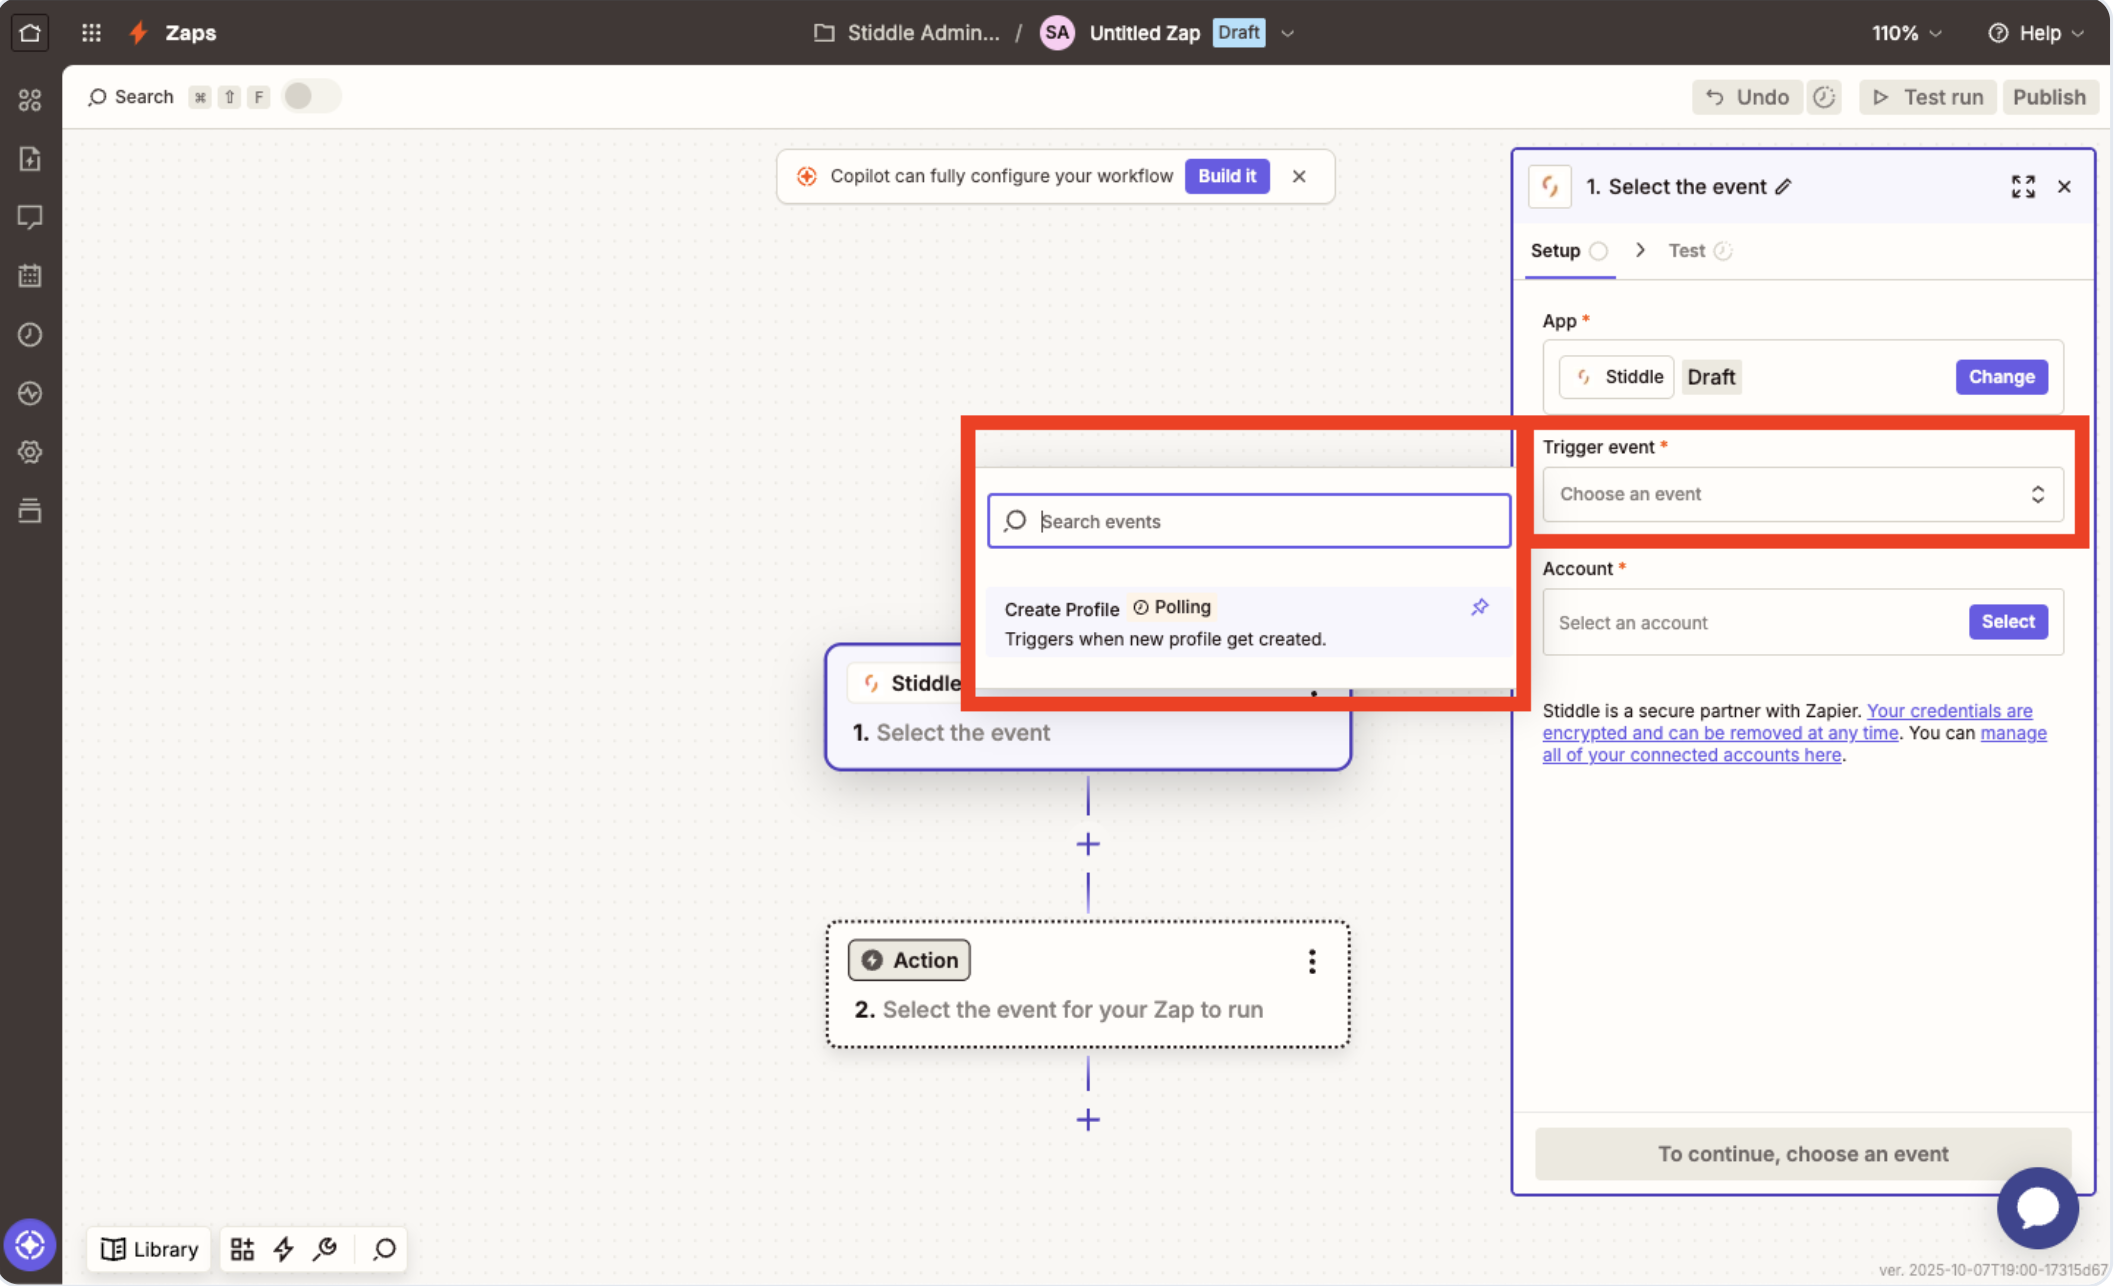
 Once the Stiddle trigger is selected, you'll need to configure the settings in the right-hand menu.
First, select the "Trigger Event", you'll see several options, select one. In this example, we've selected "Create Profile". This means that every time a new profile is generated in your Stiddle workspace, it will be triggered here in Zapier.
Once the Stiddle trigger is selected, you'll need to configure the settings in the right-hand menu.
First, select the "Trigger Event", you'll see several options, select one. In this example, we've selected "Create Profile". This means that every time a new profile is generated in your Stiddle workspace, it will be triggered here in Zapier.
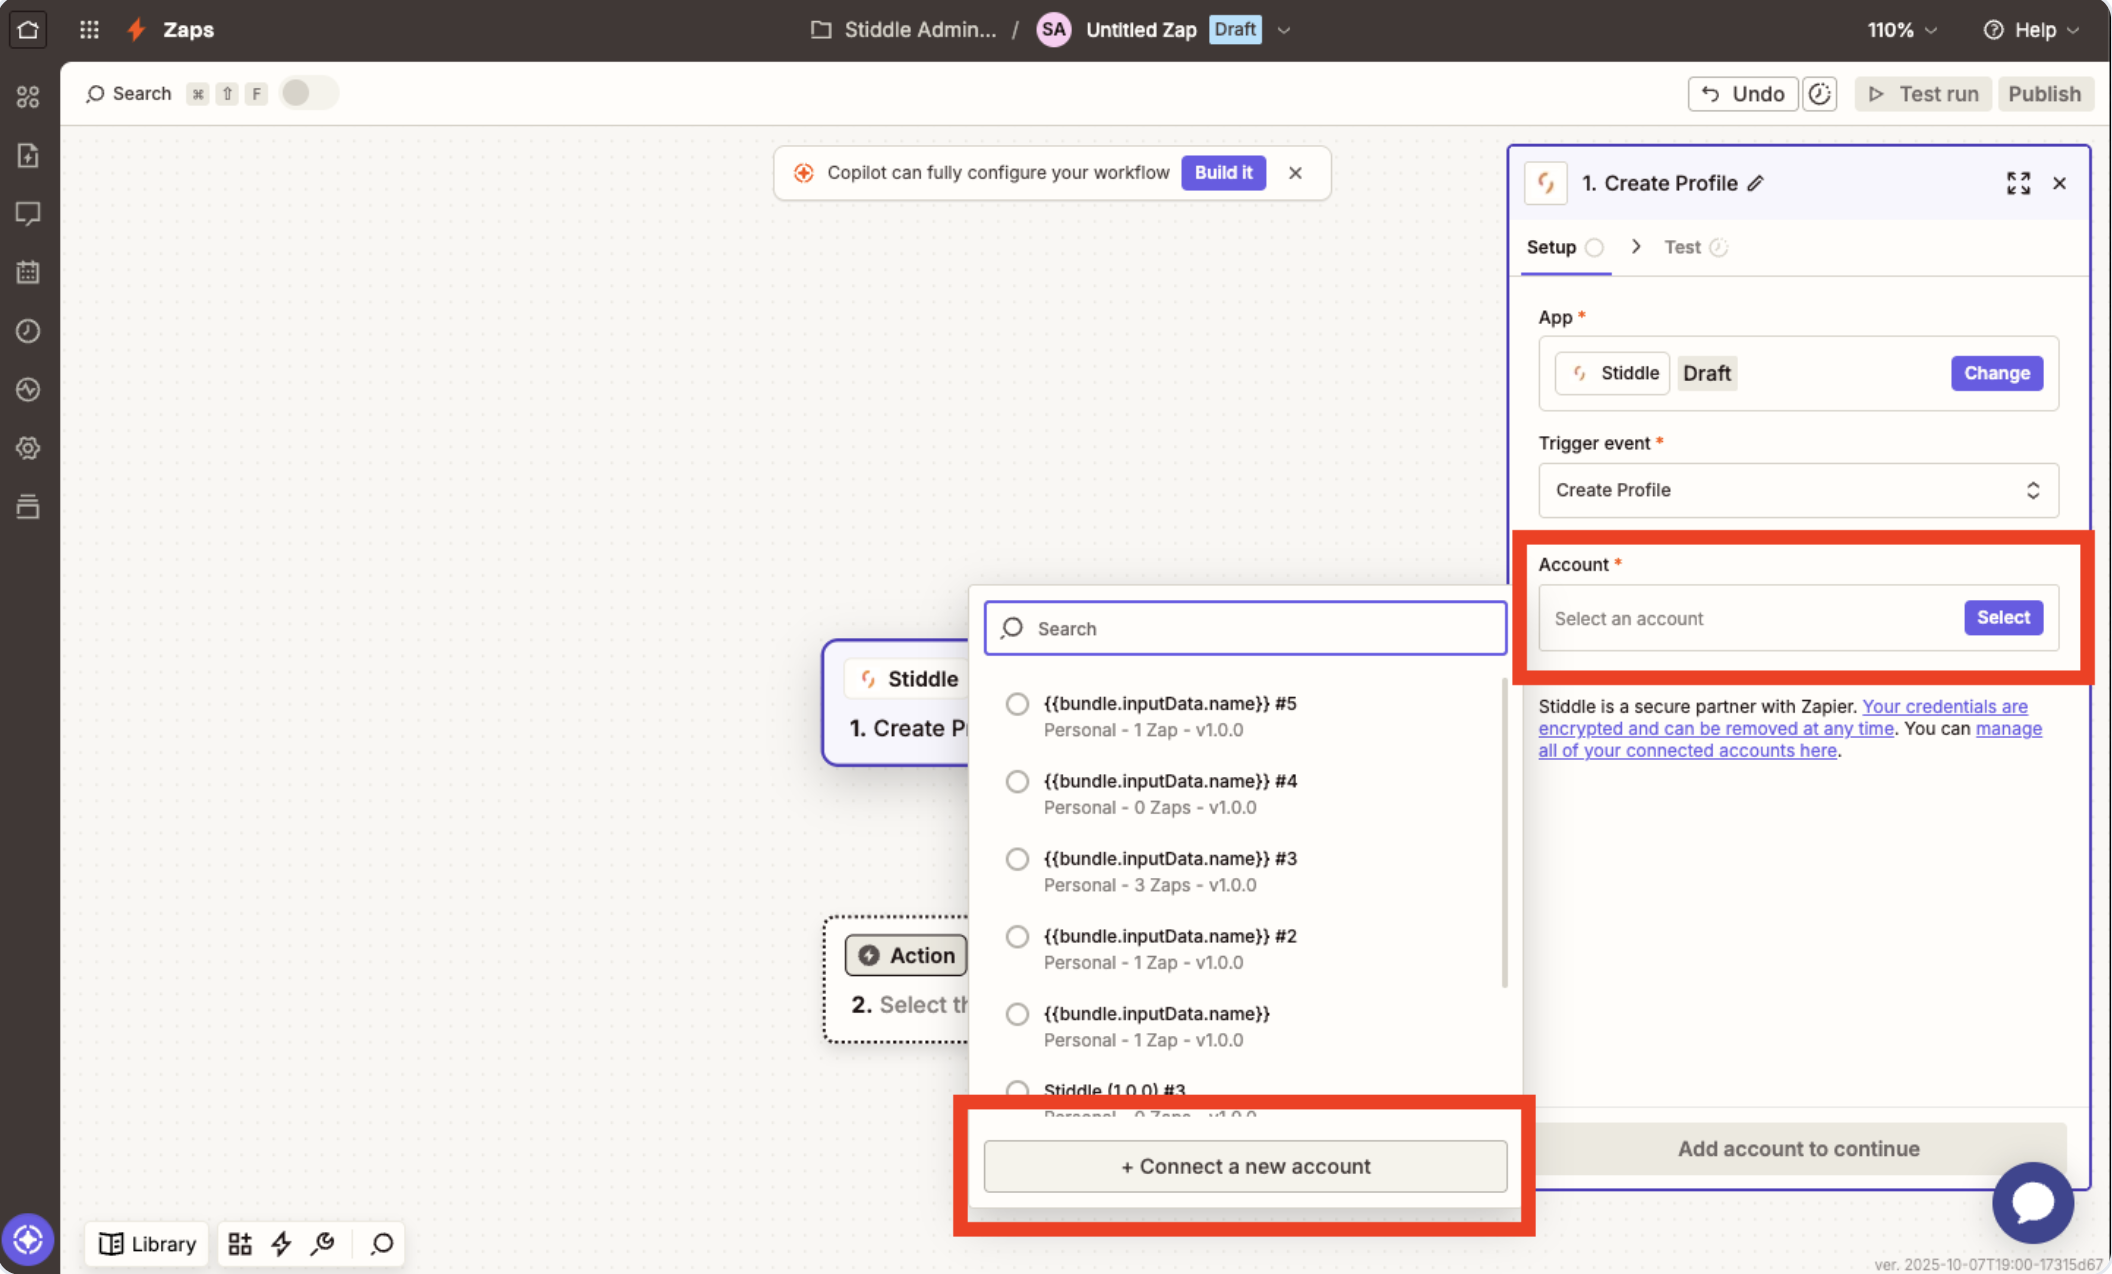
 Now it's time to authenticate and connect your Stiddle account. To do so, simply select the "Account" button, then select "Create a new account". Alternatively, if you've already connect a Stiddle workspace to Zapier, you will see it displayed in the list.
 You will now need to paste the Stiddle API Key that you copied in the previous step. Simply paste the API Key in the popup, then select "Yes, continue to Stiddle".
You will now see your Stiddle workspace connected to Zapier and selected under "Account". To continue, select the "Continue" button.
You will now need to paste the Stiddle API Key that you copied in the previous step. Simply paste the API Key in the popup, then select "Yes, continue to Stiddle".
You will now see your Stiddle workspace connected to Zapier and selected under "Account". To continue, select the "Continue" button.
 You can then test the trigger to make sure data is flowing and it fires properly. To do this, simply select "Test Trigger".
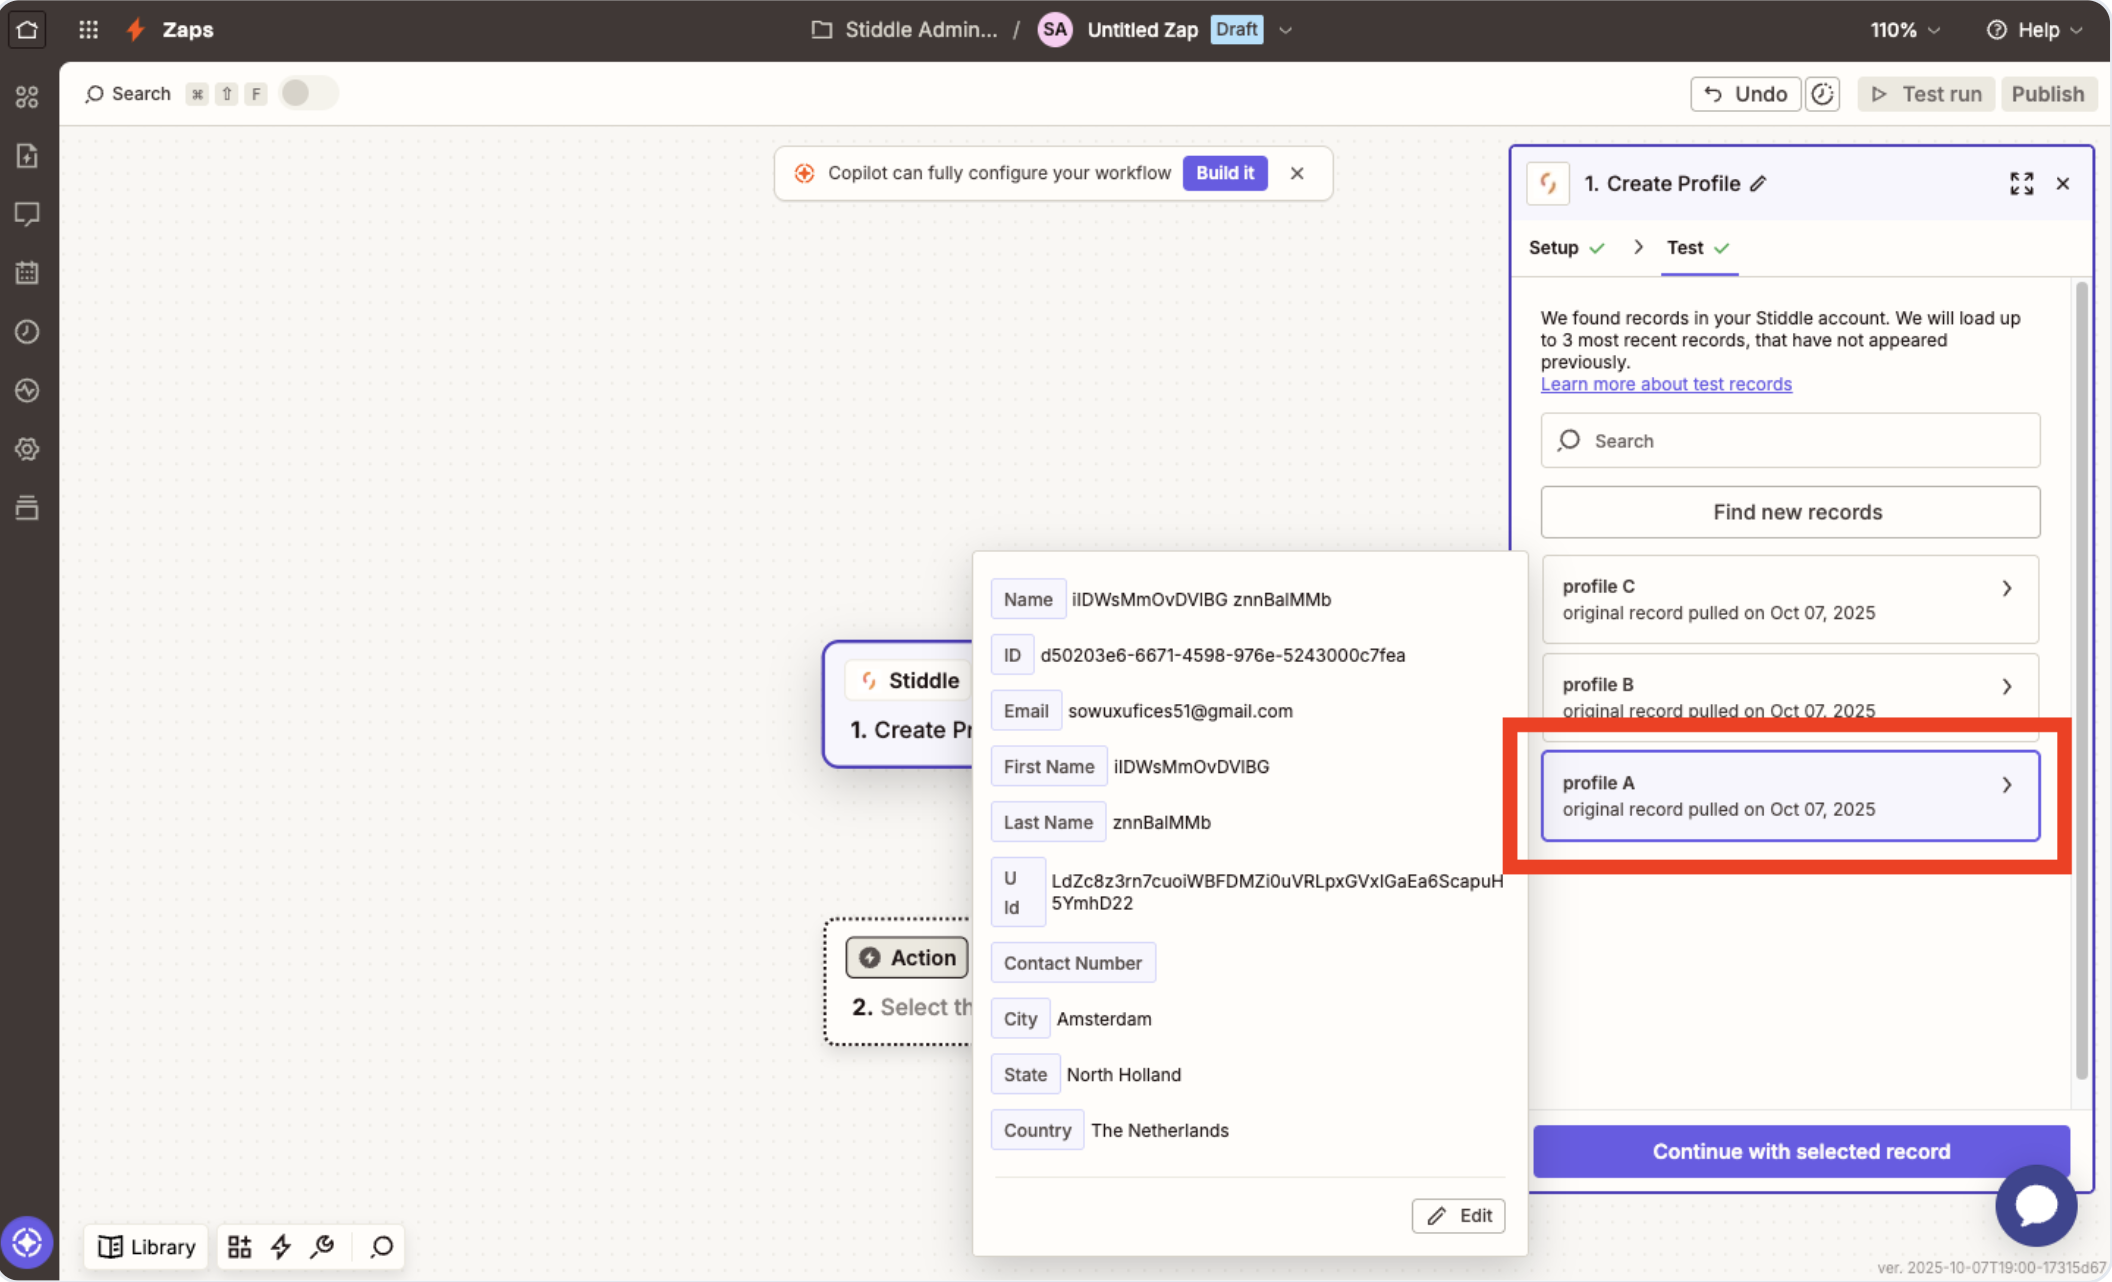
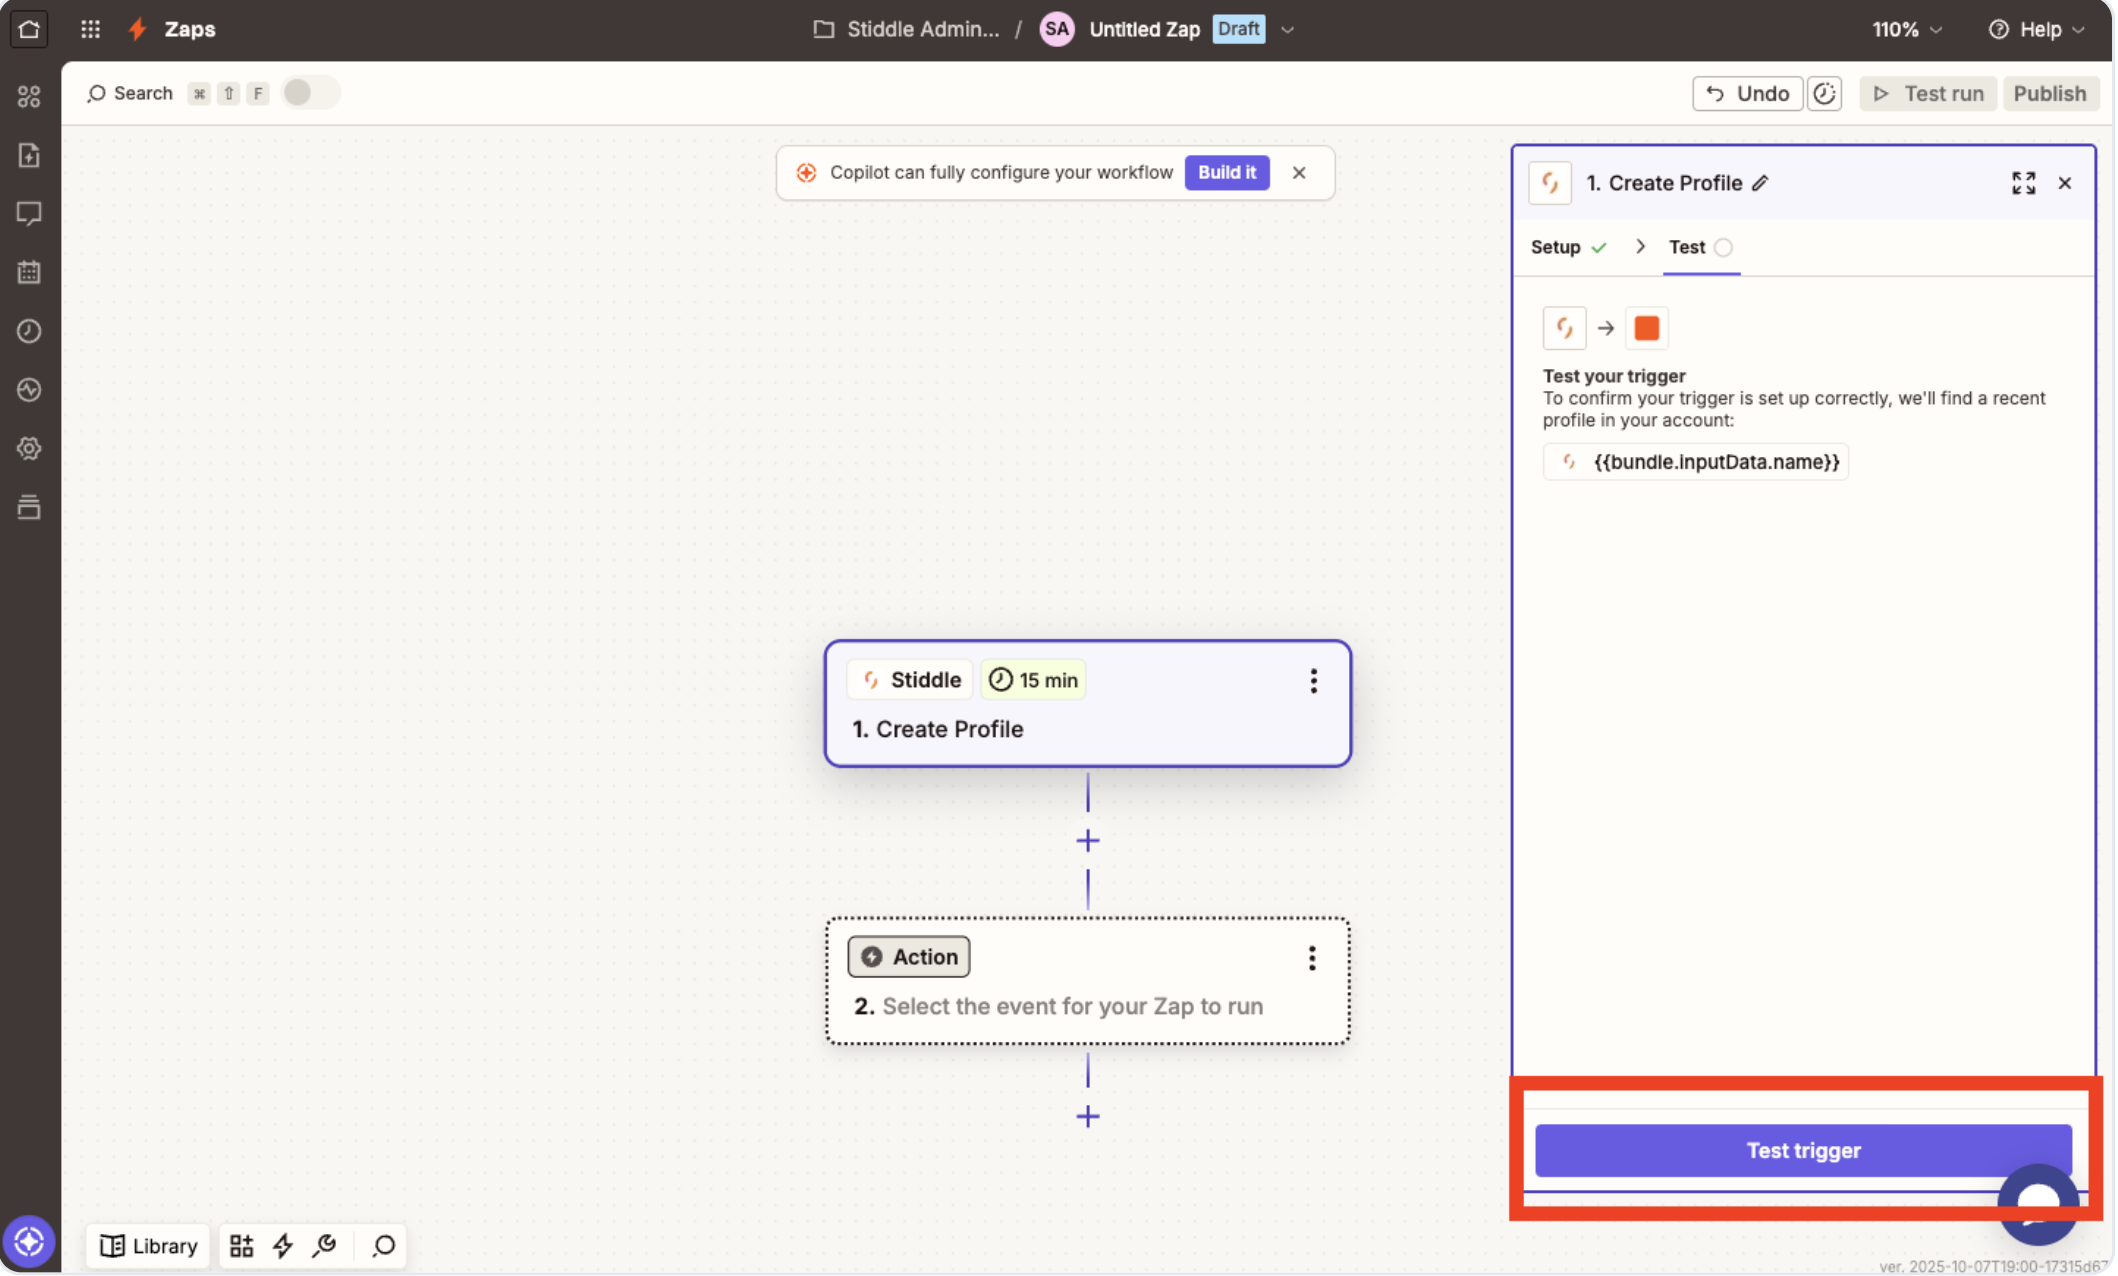 You will see a list of a few live profiles from your Stiddle workspace. This is a clear indication that data is now flowing from Stiddle to Zapier!
Click "Continue" and you're almost finished!
You will see a list of a few live profiles from your Stiddle workspace. This is a clear indication that data is now flowing from Stiddle to Zapier!
Click "Continue" and you're almost finished!
 ### Creating Your First Zap - Action
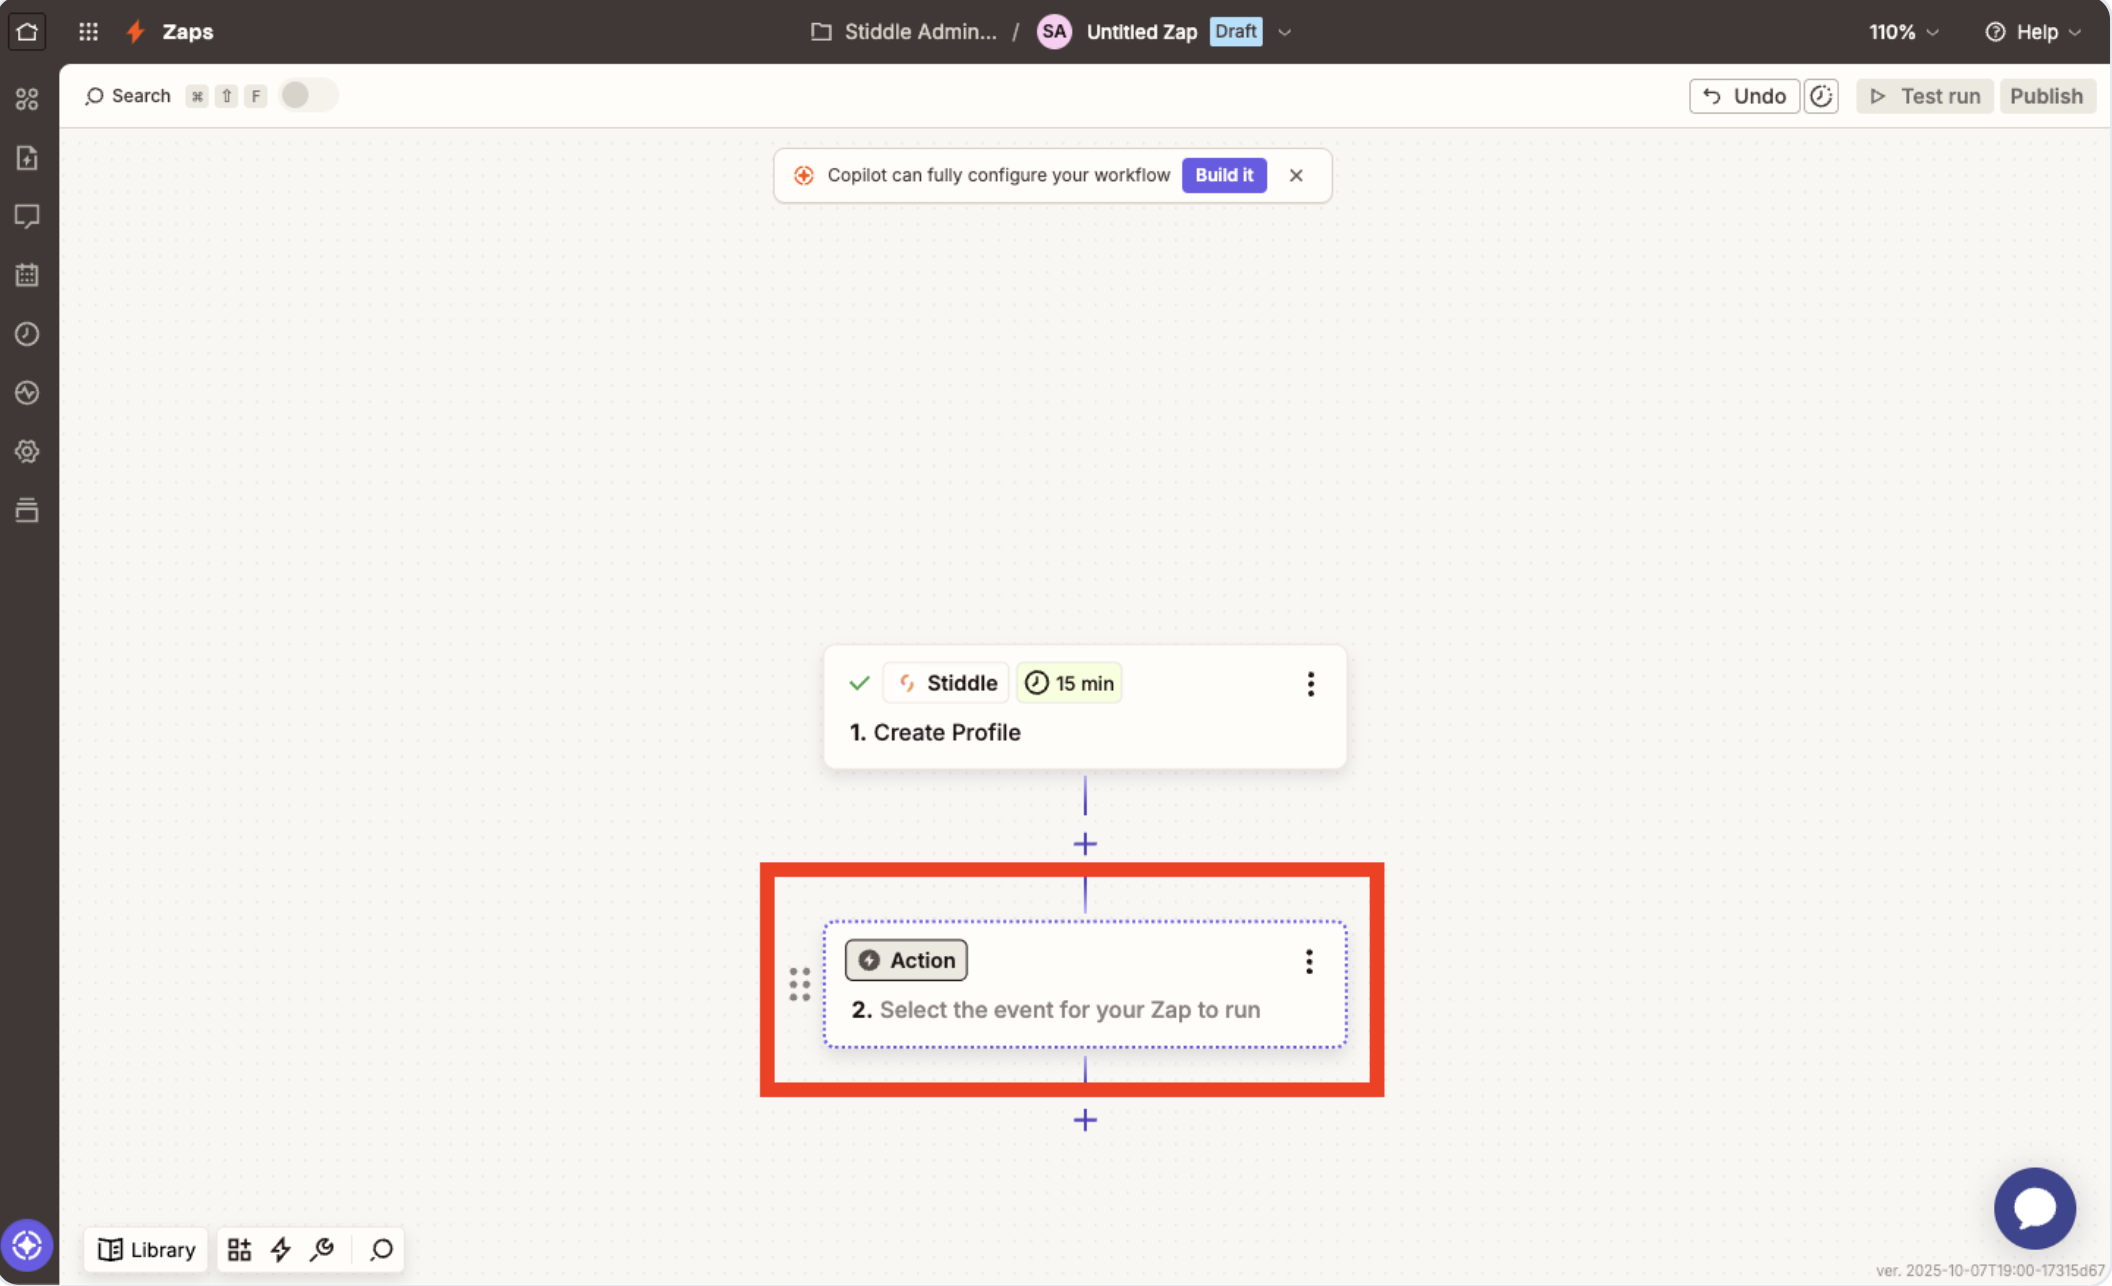
Now that you've connected Stiddle to Zapier and created your first trigger, you'll now need to select an action in Zapier to send the Stiddle data to. In this example, we're going to send new profiles generated in Stiddle to Google Sheets.
To do so, first we'll need to select an action. In this case, we'll type "Google Sheets" and select.
### Creating Your First Zap - Action
Now that you've connected Stiddle to Zapier and created your first trigger, you'll now need to select an action in Zapier to send the Stiddle data to. In this example, we're going to send new profiles generated in Stiddle to Google Sheets.
To do so, first we'll need to select an action. In this case, we'll type "Google Sheets" and select.
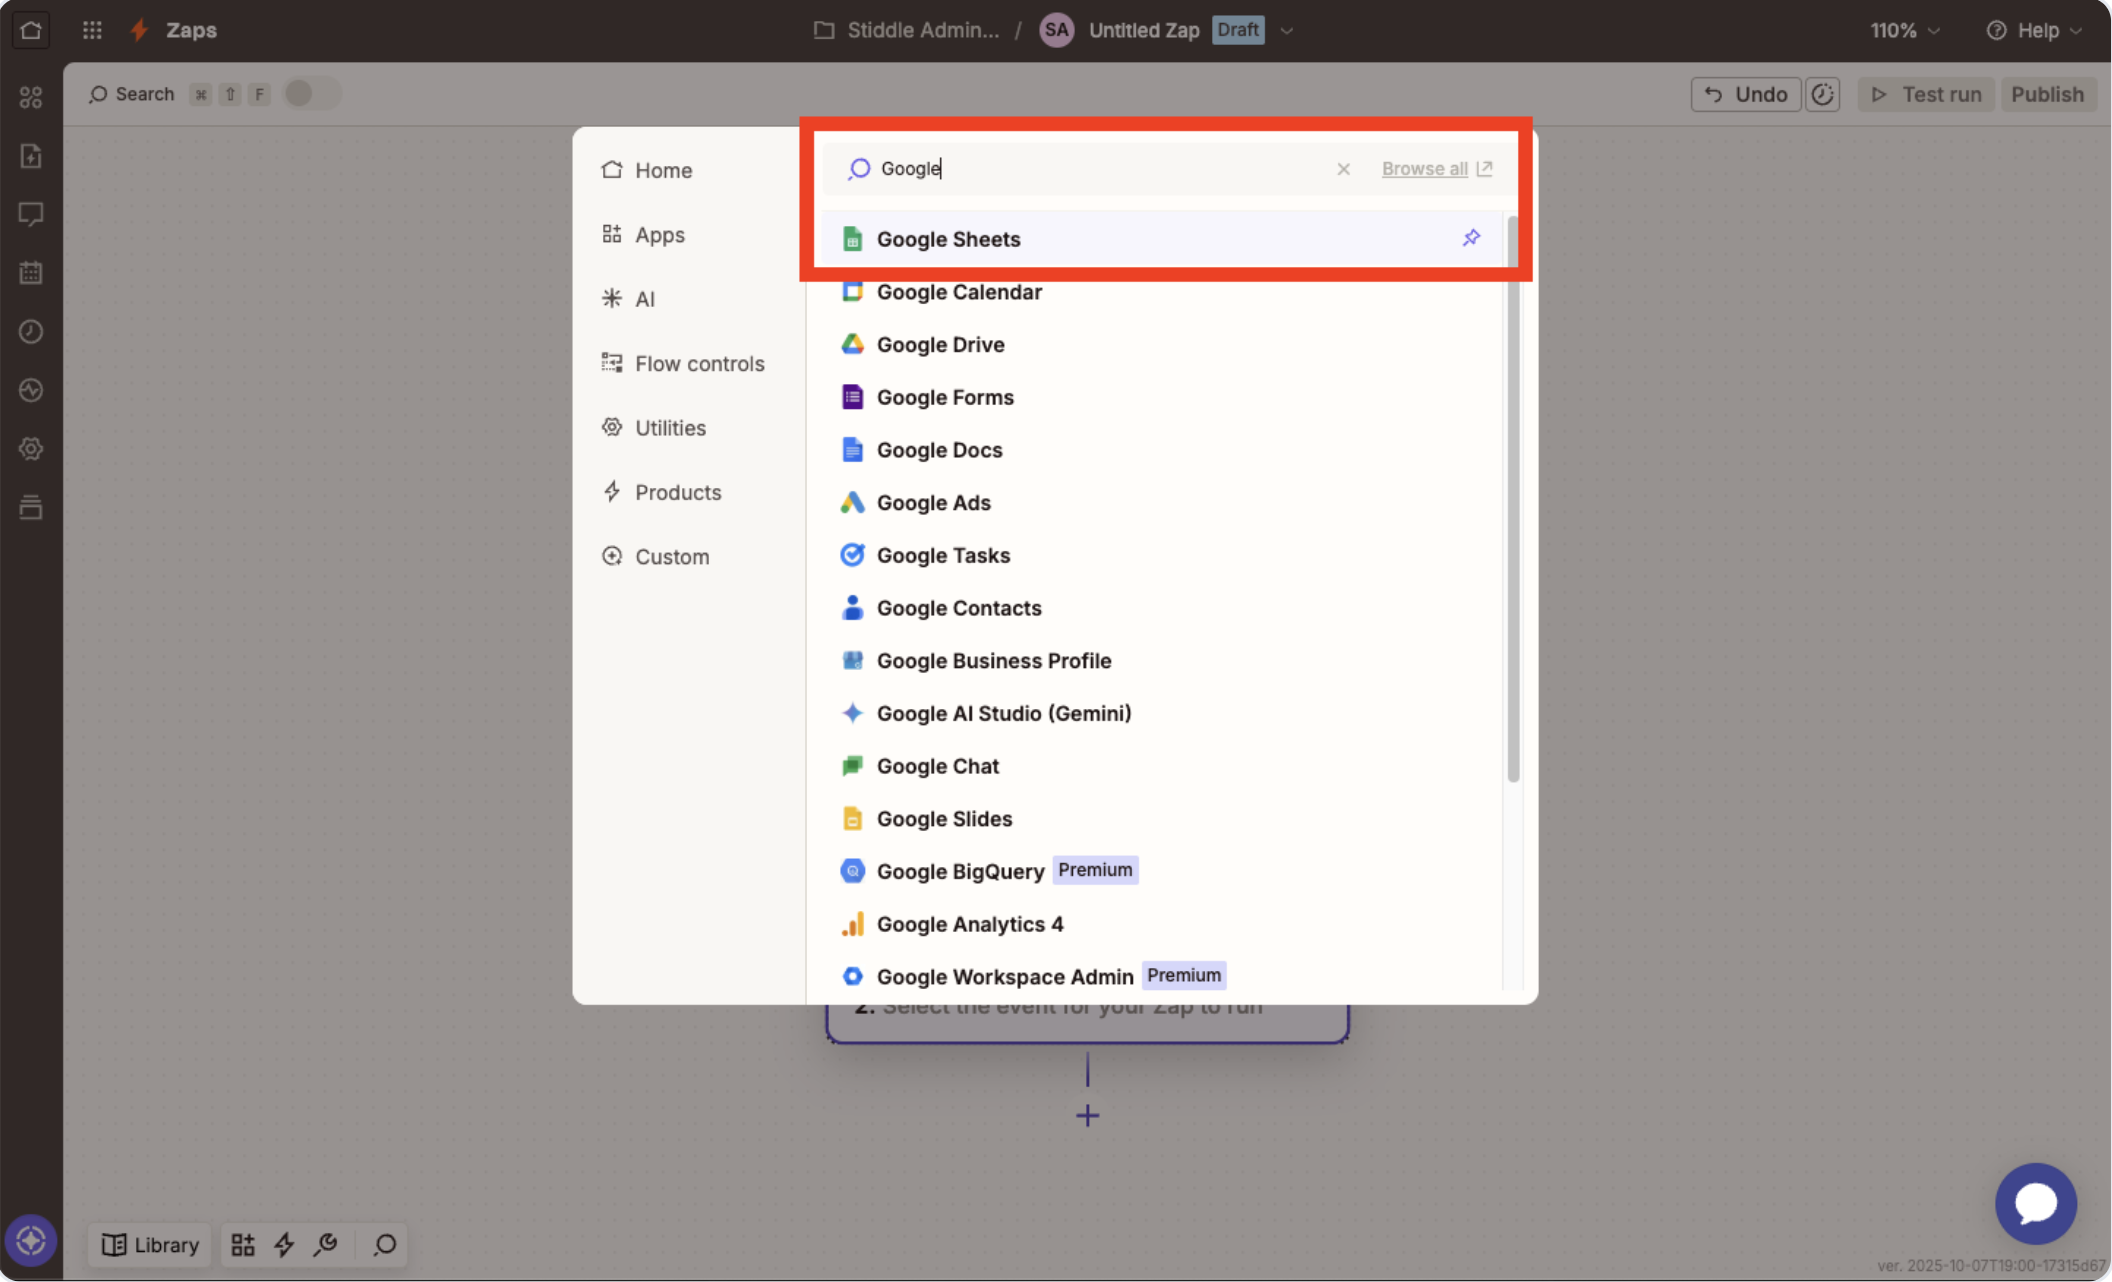 Once we select "Google Sheets" as an app, we'll see the configurations in the right-hand side.
Next, simply select an "Action Event", in this example we're going to select "Create Spreadsheet Row" - since we want all new Stiddle profiles to be added into a new row within Google Sheets.
Once we select "Google Sheets" as an app, we'll see the configurations in the right-hand side.
Next, simply select an "Action Event", in this example we're going to select "Create Spreadsheet Row" - since we want all new Stiddle profiles to be added into a new row within Google Sheets.
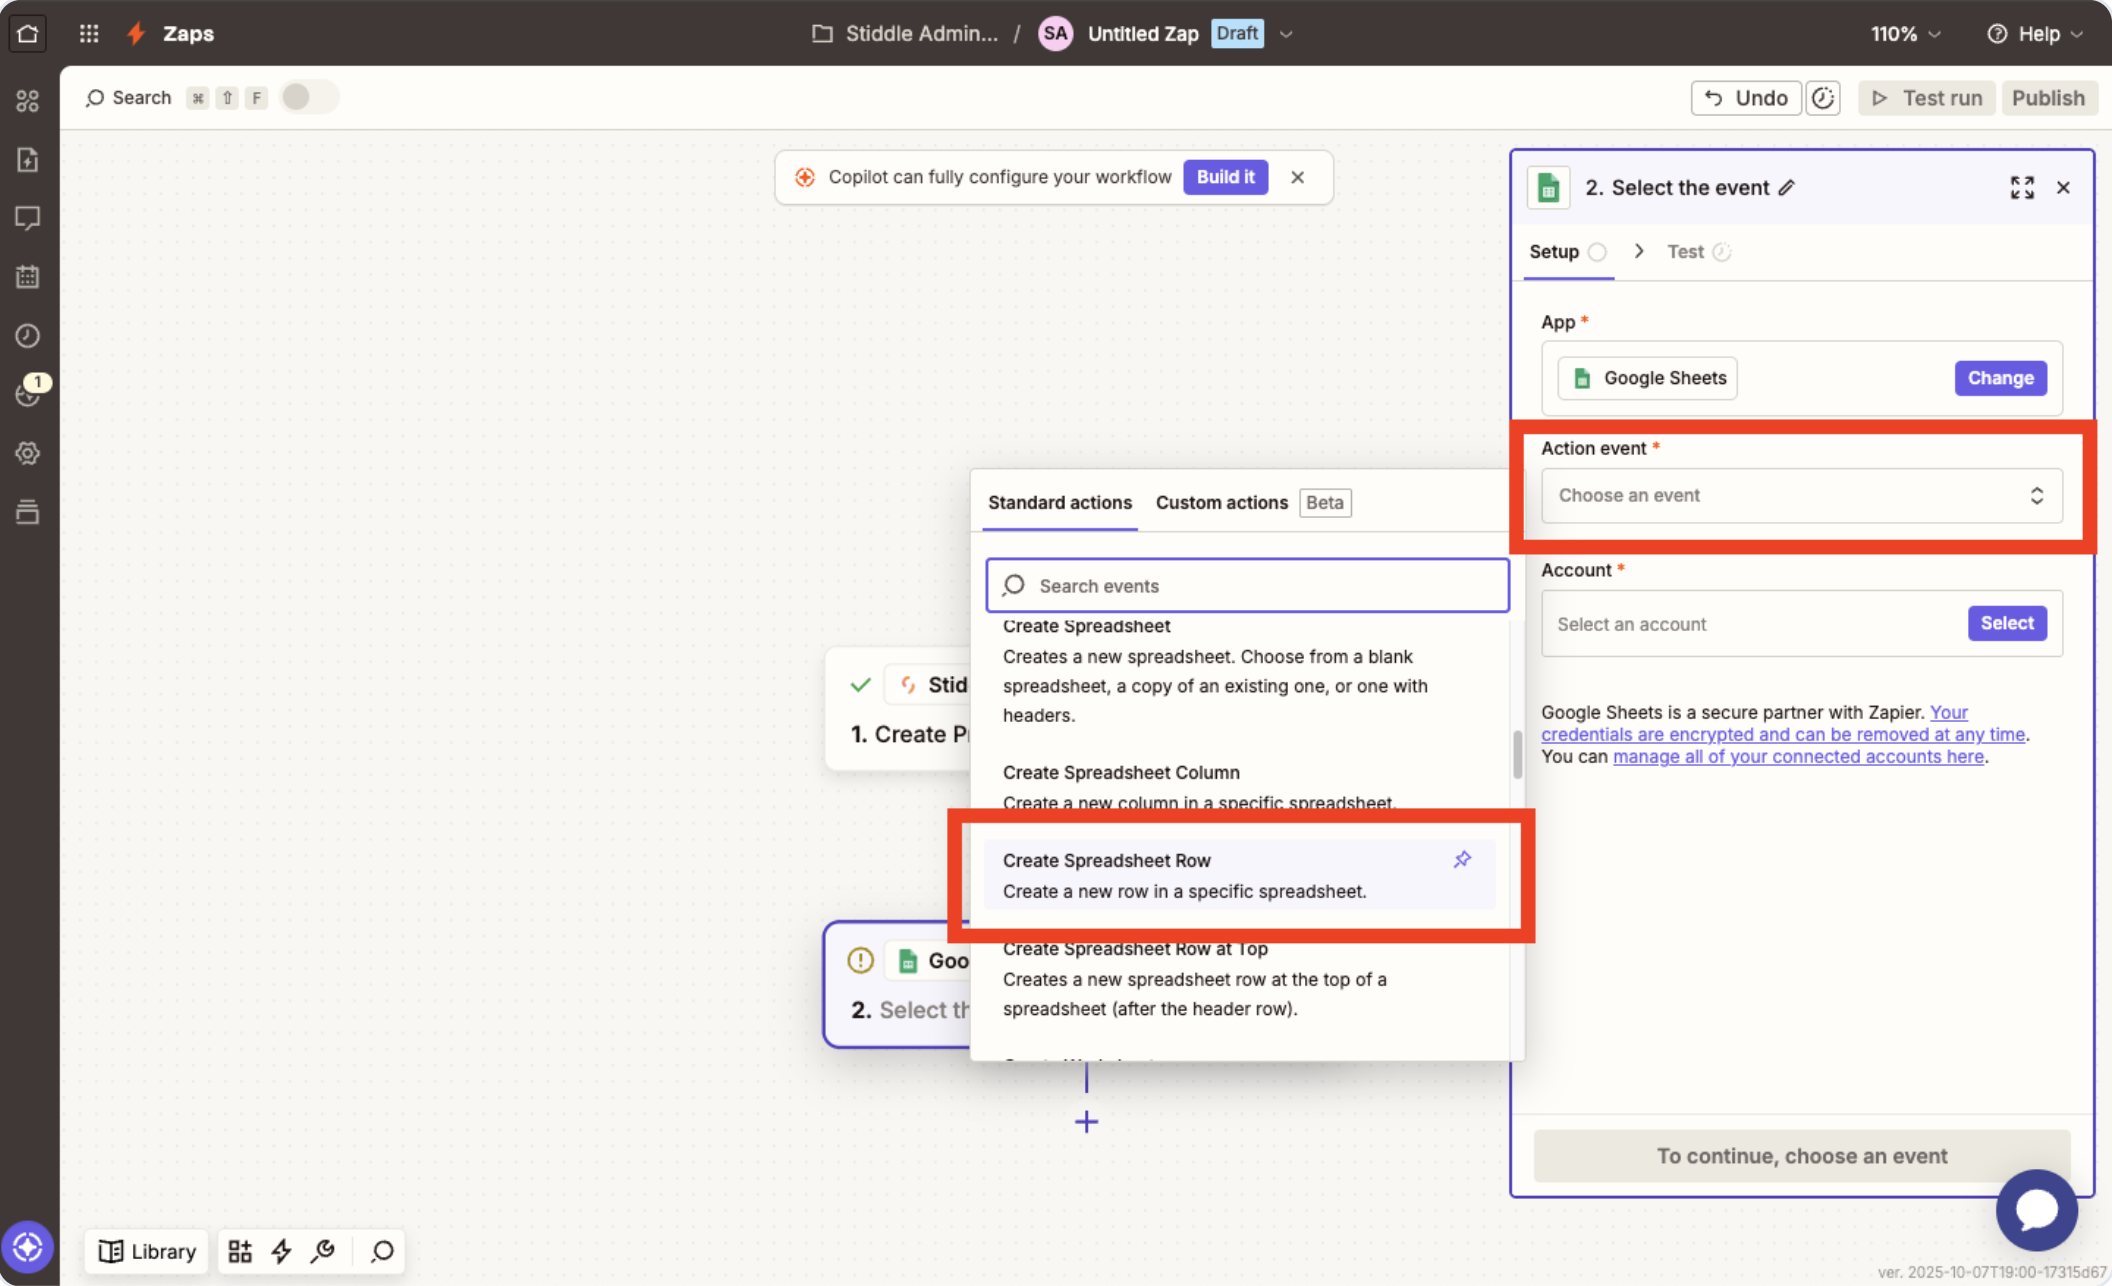 After selecting the action event, you'll need to authenticate and connect your Google Sheets account. To do so, select the "Account" button then follow the steps to connect your Google account. Then select "Continue".
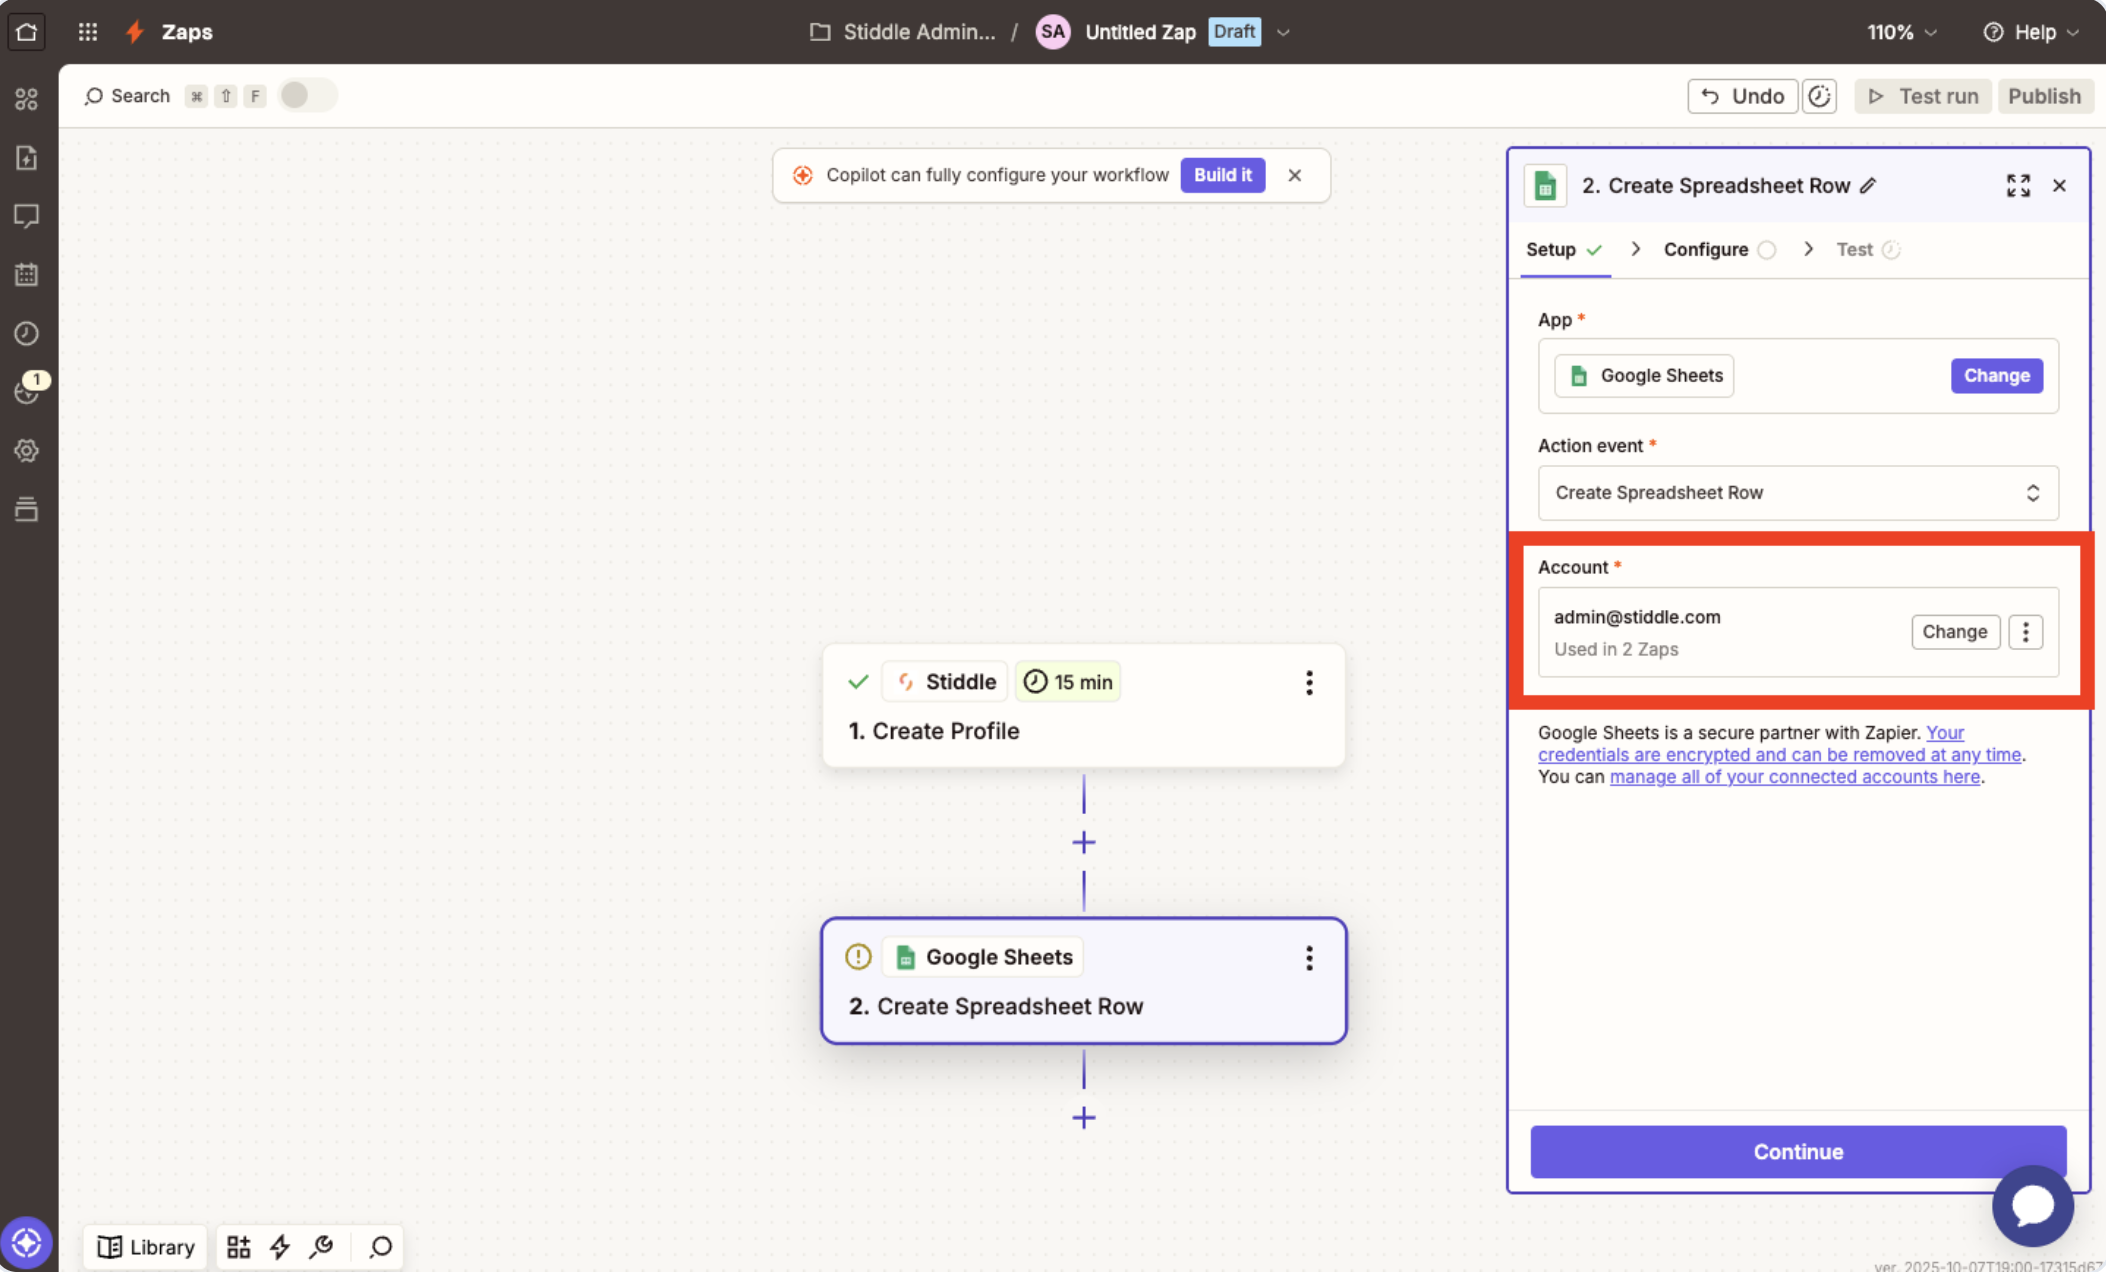 From here, you'll need to select a few options so Zapier knows which Google Sheet to send Stiddle profiles to. To start, select your "Drive", "Spreadsheet", and Worksheet".
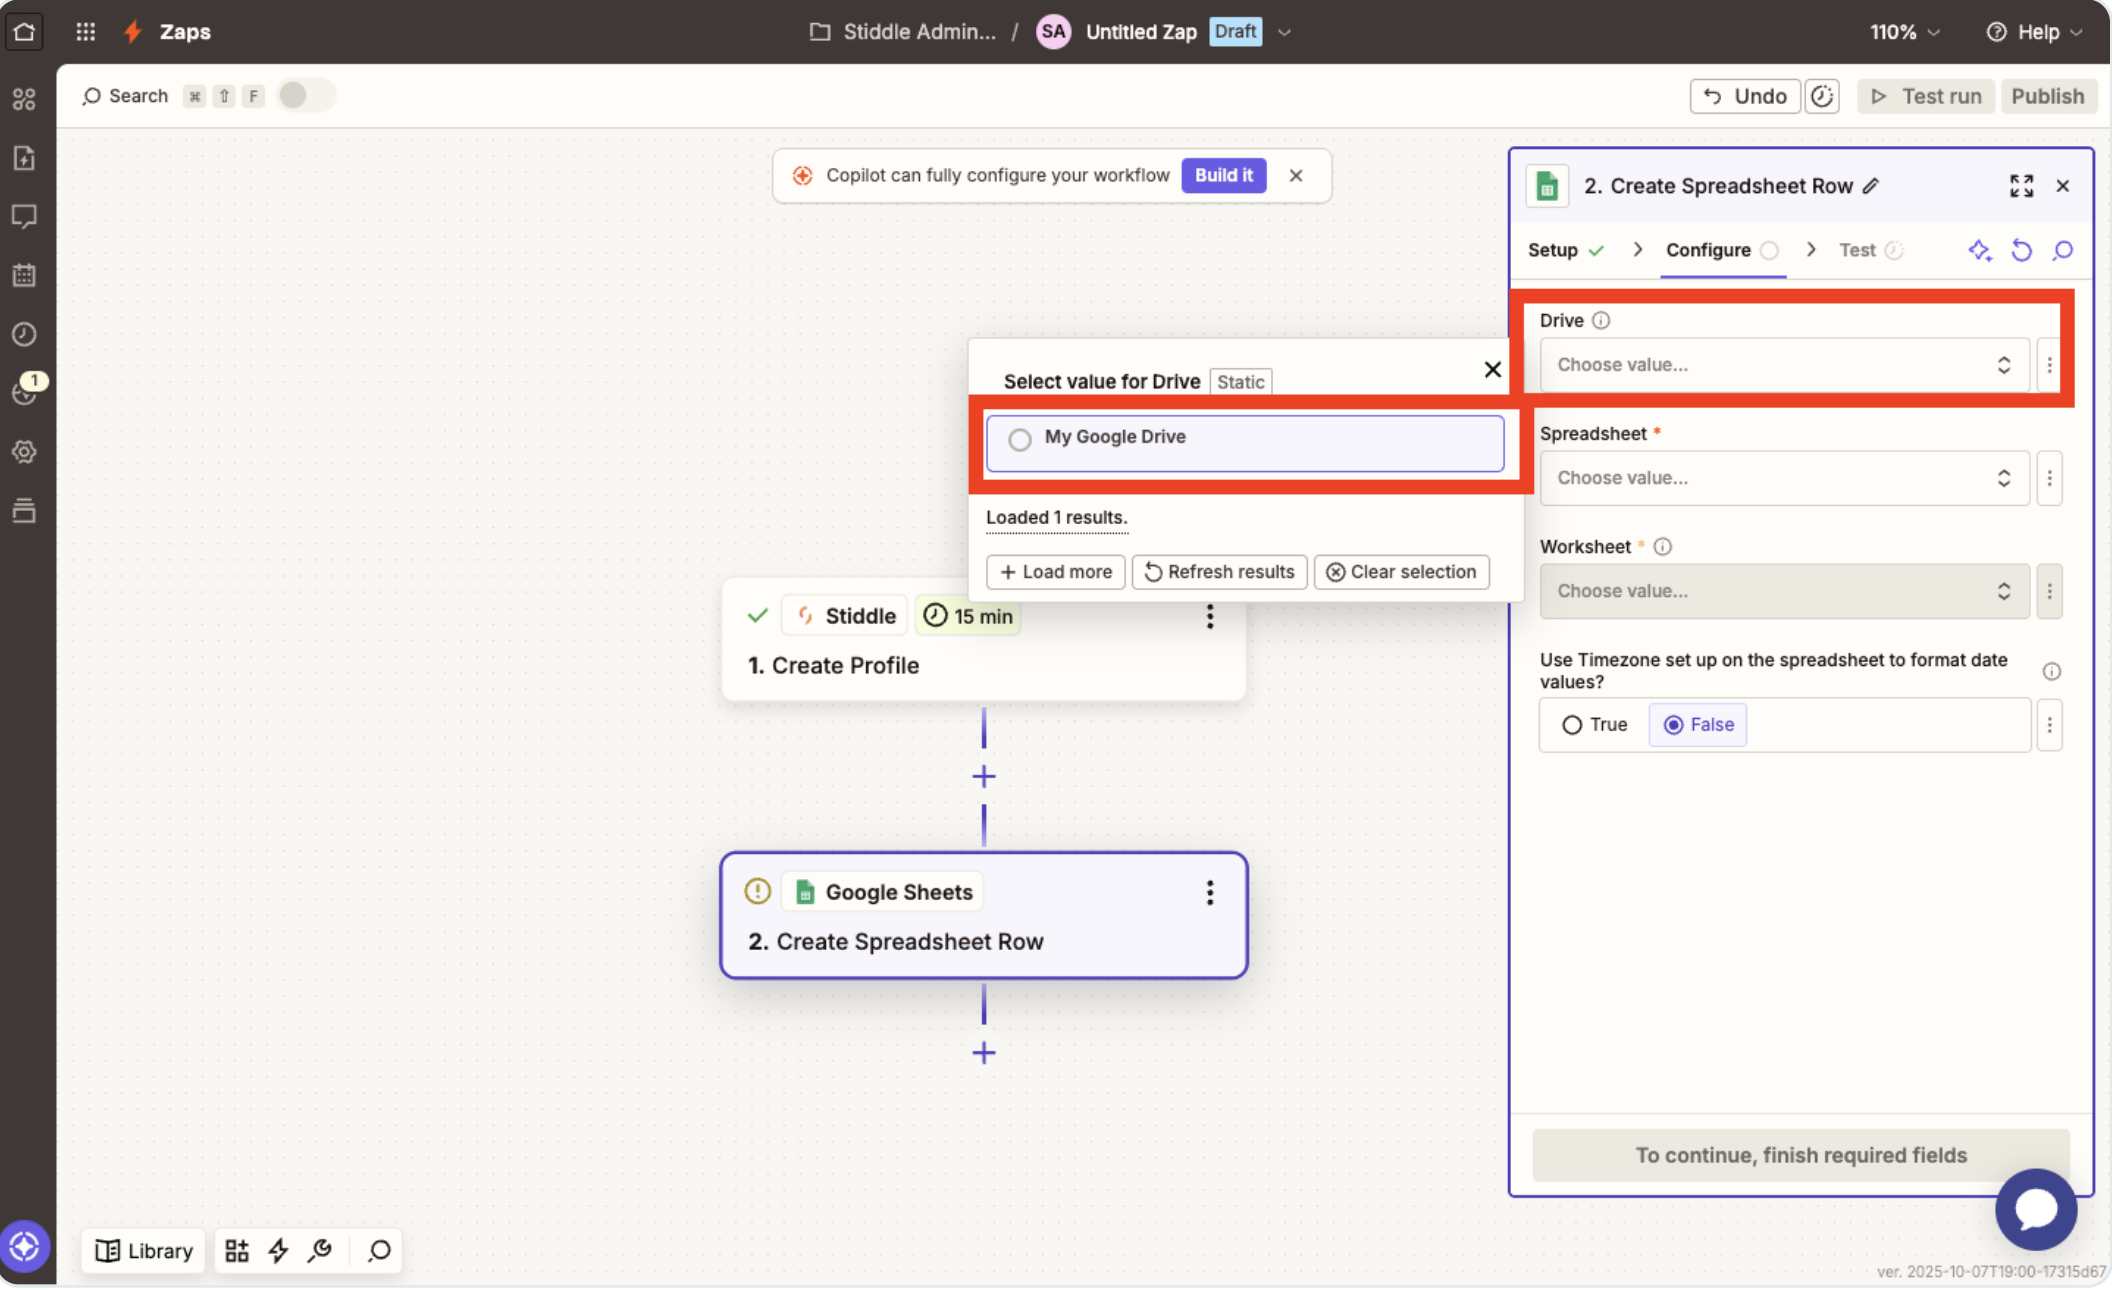 Once selected, you'll see more option fields populate. If you don't see these, follow the Zapier/Google Sheets doc to learn how to format your Google Sheet columns/rows.
From here, simply select which criteria from the Stiddle profile you want to map to each column in Google Sheets.
Once selected, you'll see more option fields populate. If you don't see these, follow the Zapier/Google Sheets doc to learn how to format your Google Sheet columns/rows.
From here, simply select which criteria from the Stiddle profile you want to map to each column in Google Sheets.
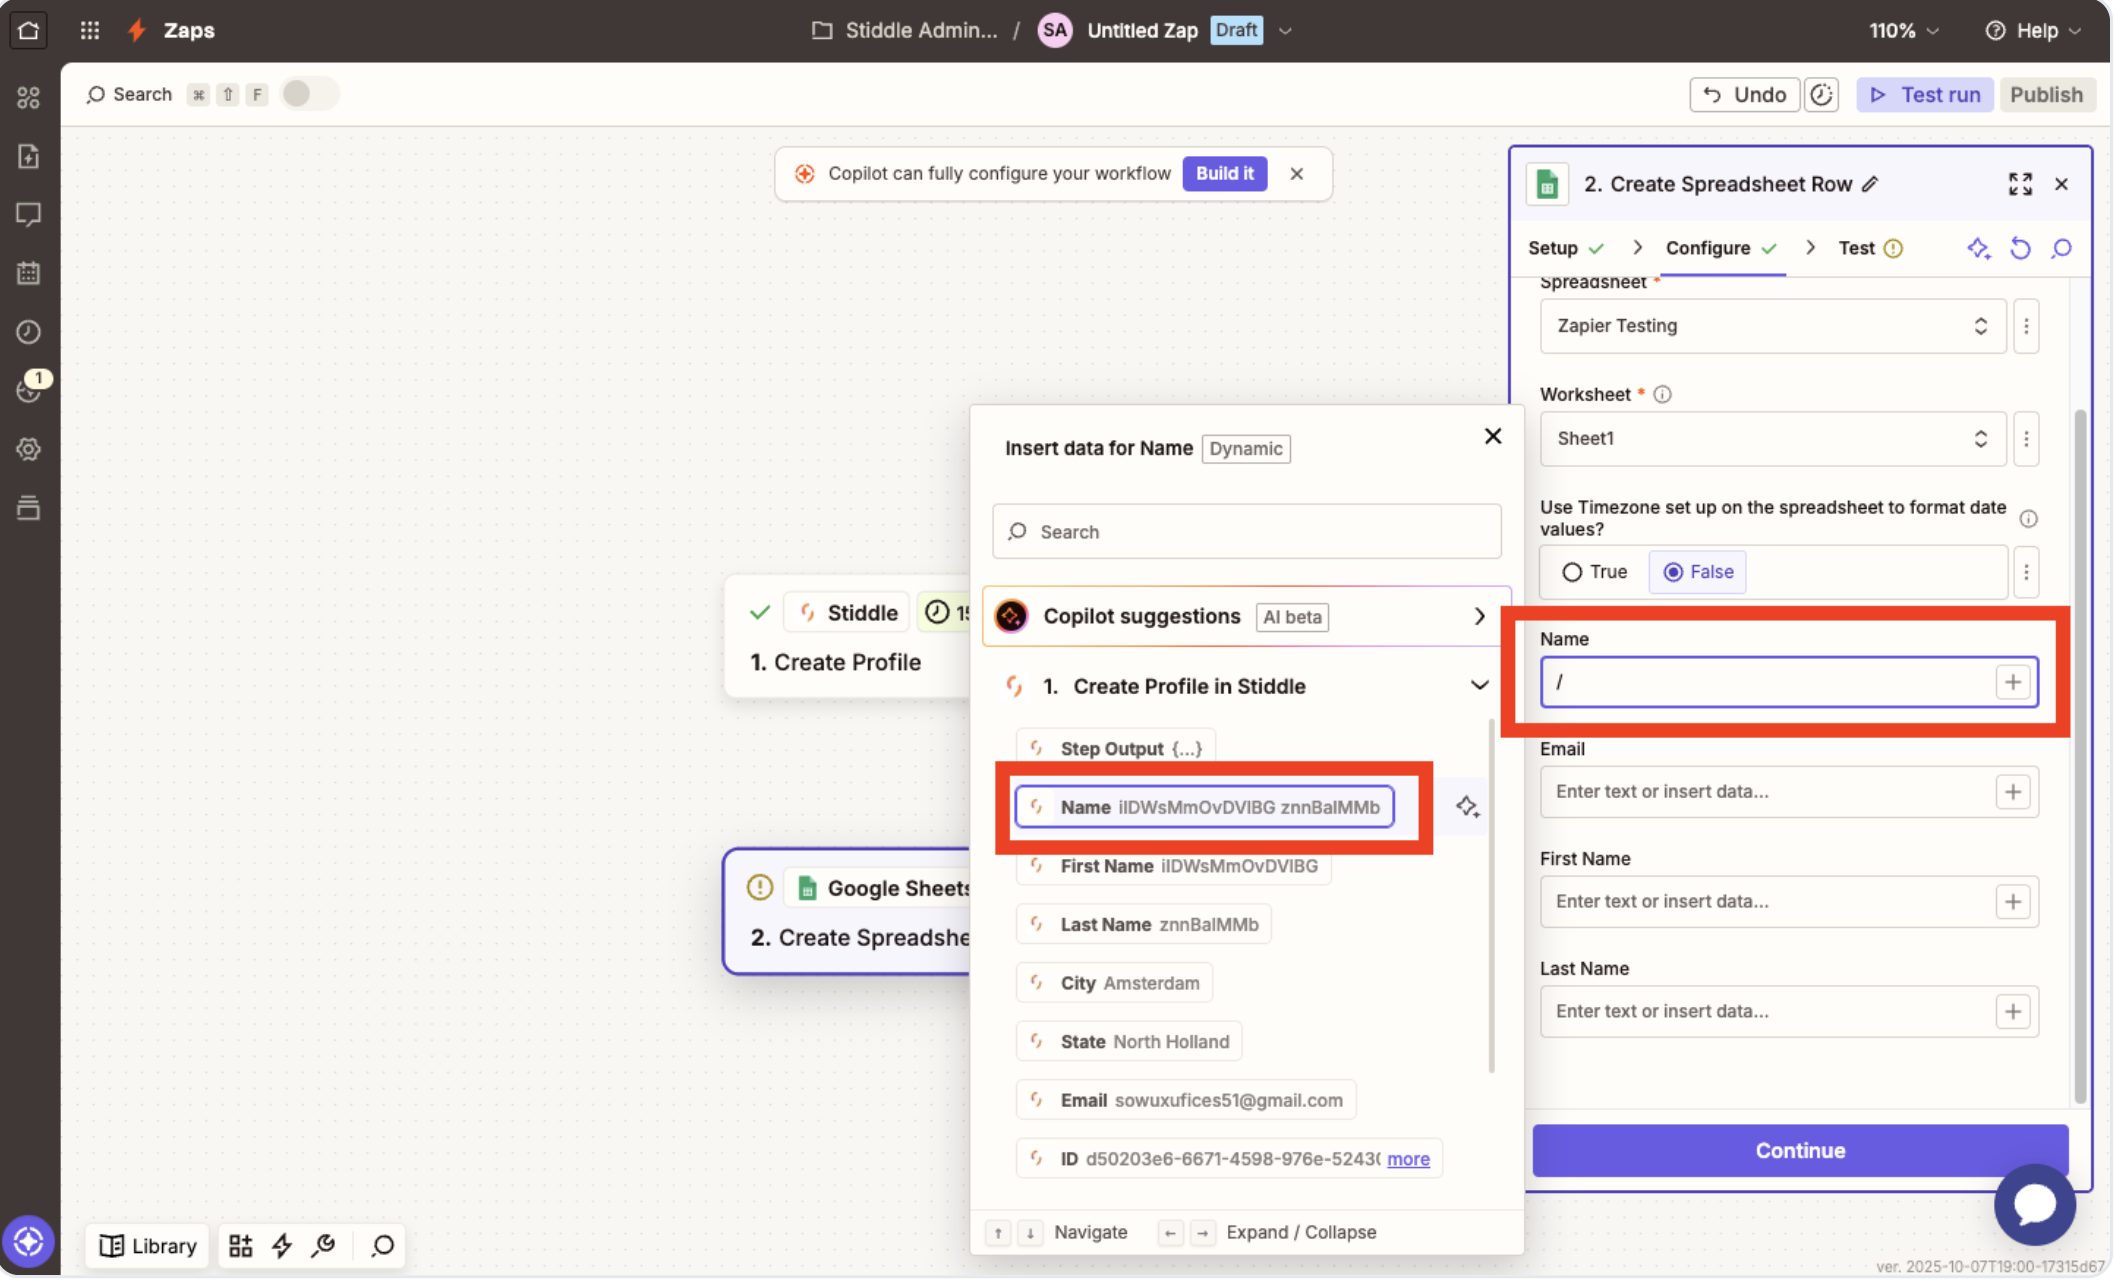 Once finished mapping, select "Continue". Verify the data is flowing and mapped correctly, then select "Test Step".
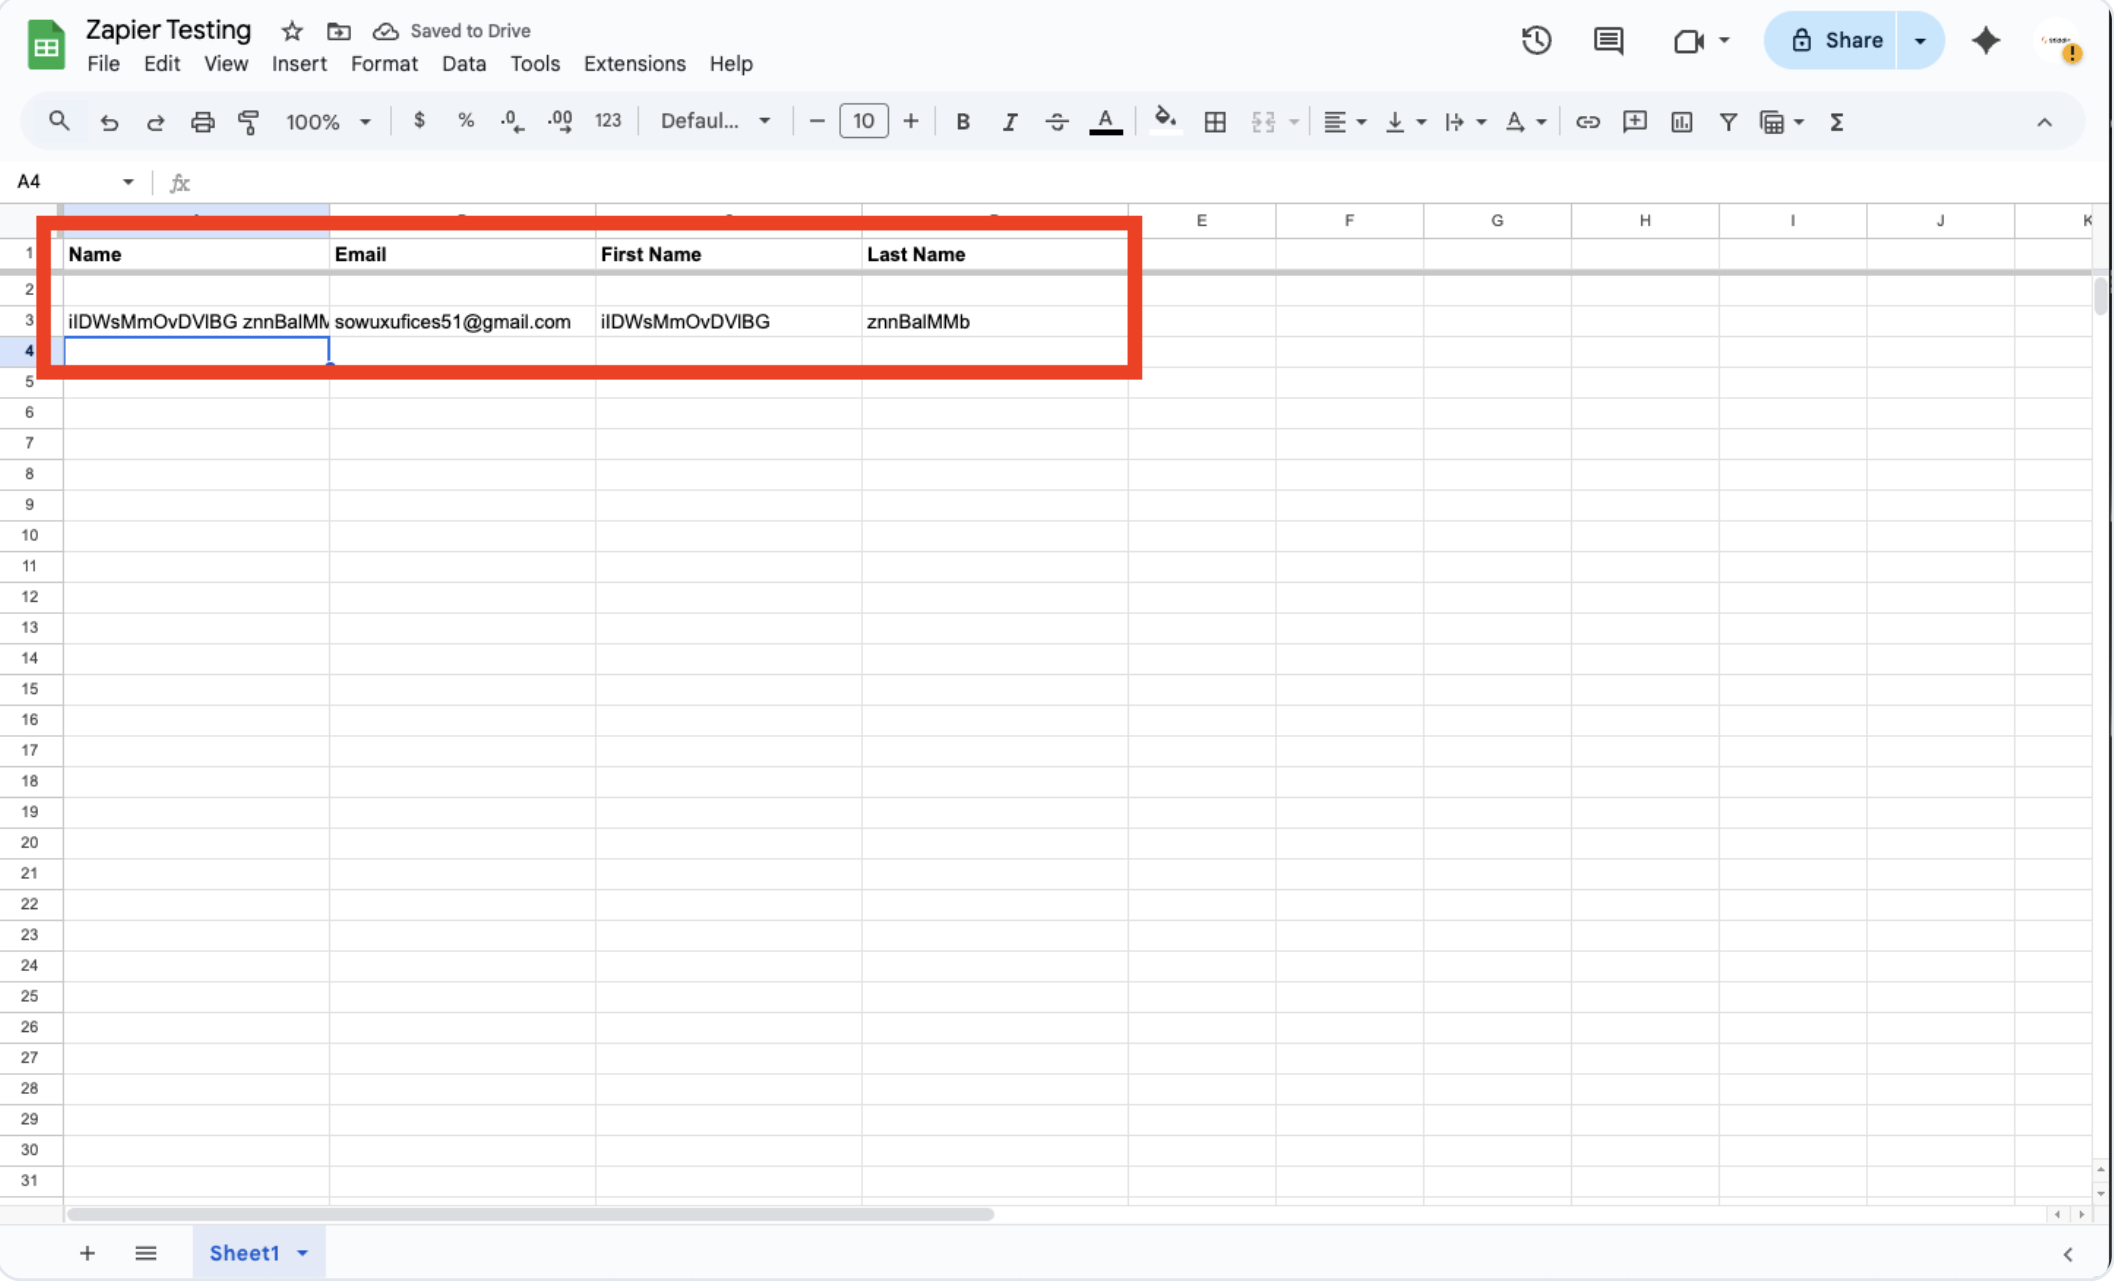
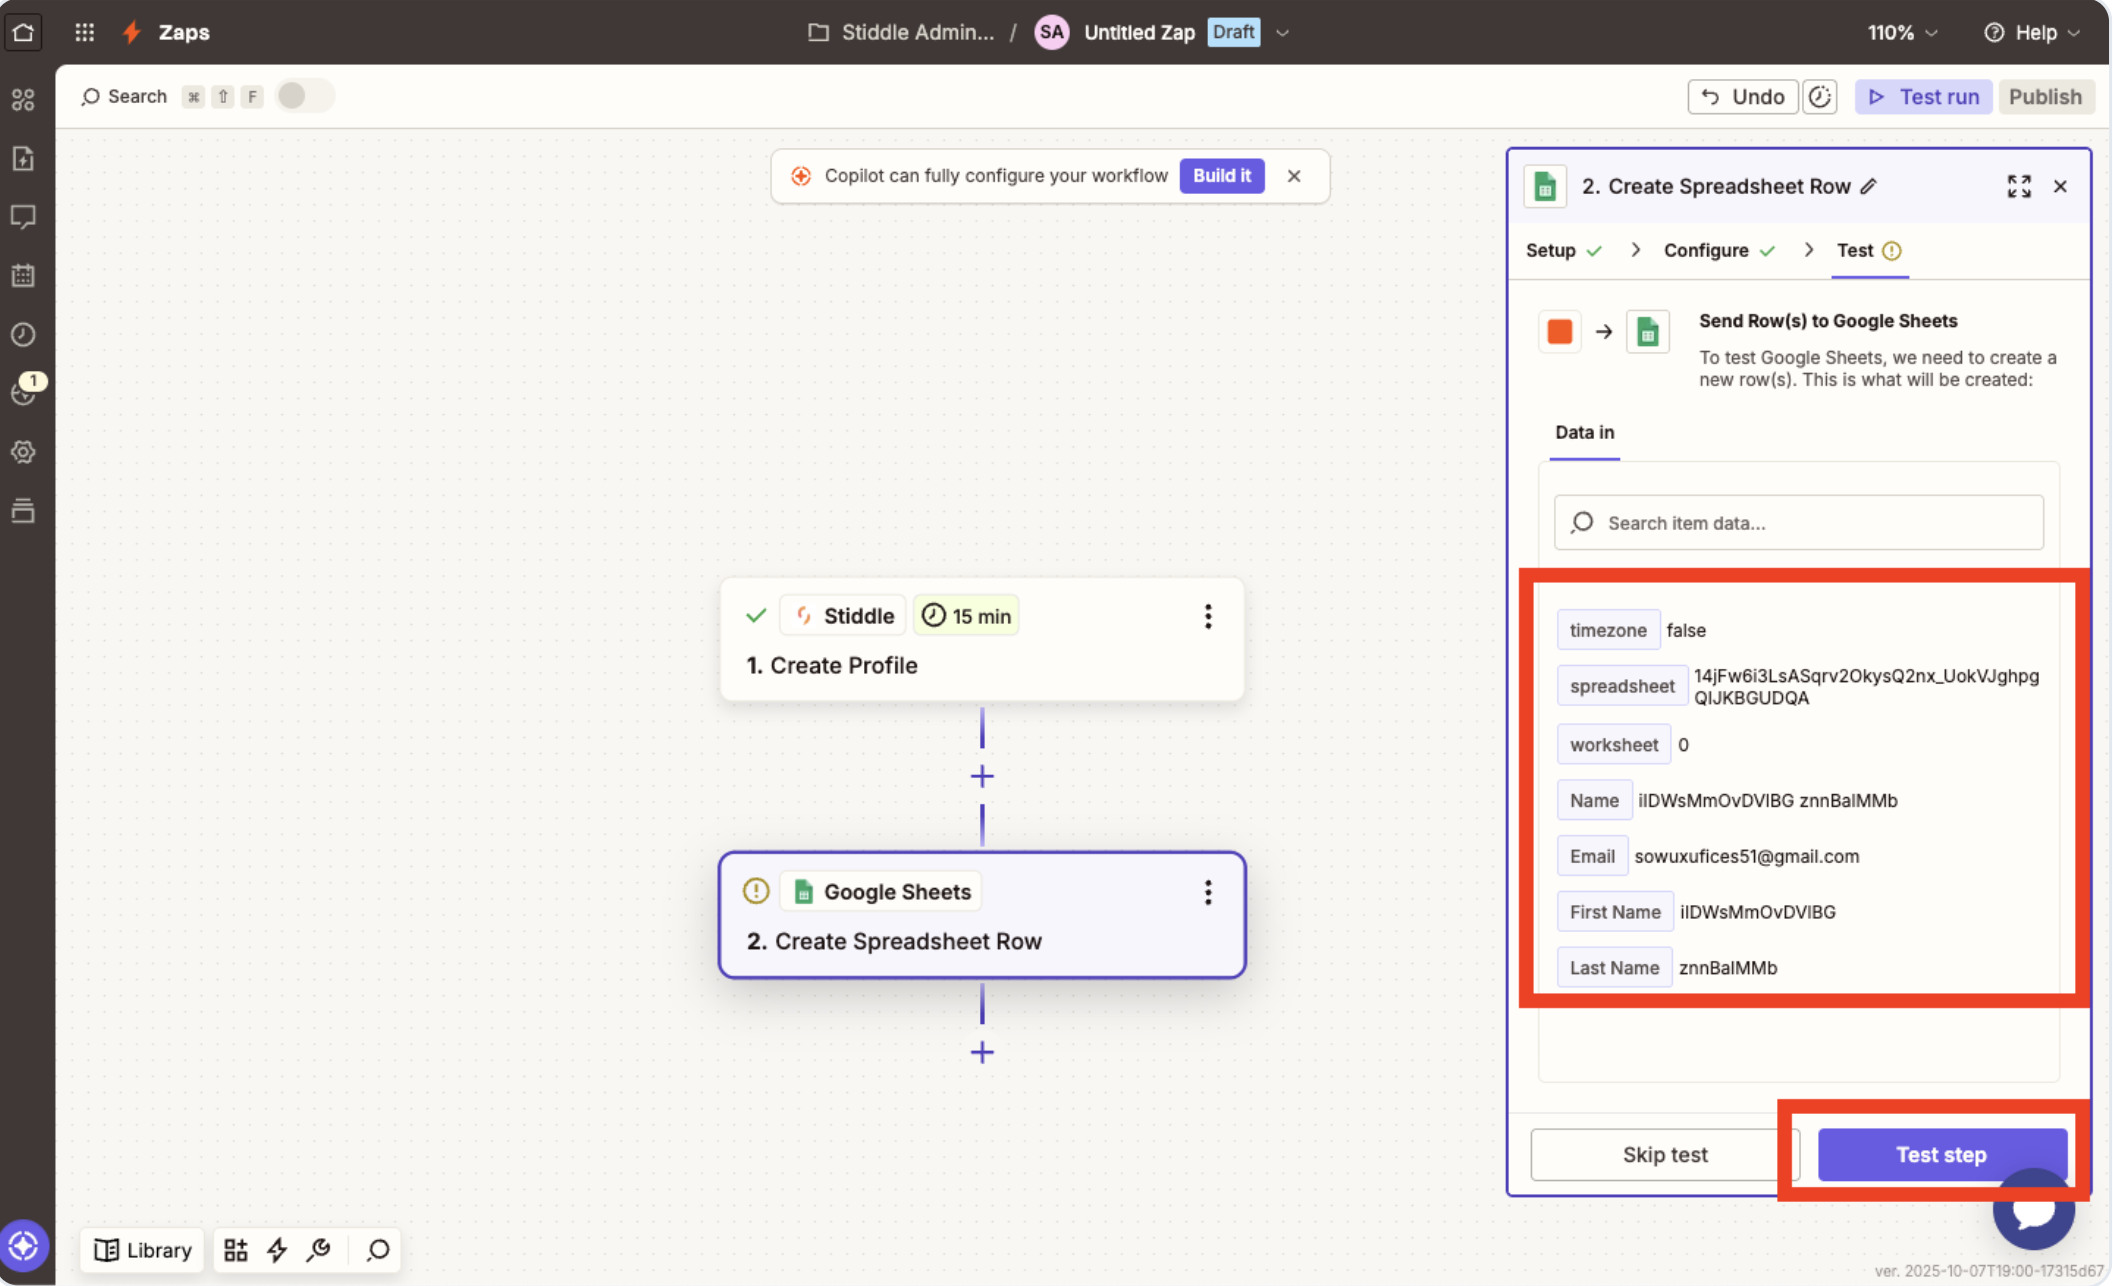 Once tested, you'll see the first profile sent to your Google Sheet successfully. Finally, click "Publish" and that's it, you're now done!
 ## Sending Events to Stiddle using Zapier
In the example below, we’ll explain how to send events to Stiddle using Zapier. Specifically, this walkthrough shows how to send Facebook lead form submissions from ads into Stiddle for tracking and attribution. However, this same process can be used to send events and data from any Zapier integration.
[https://www.loom.com/share/0255c3dabb054c79a68dcc8ce12ee8ae](https://www.loom.com/share/0255c3dabb054c79a68dcc8ce12ee8ae)
If you have any questions, run into any issues, or want to request a new trigger or action, please reach out to support. [hello@stiddle.com](mailto:hello@stiddle.com)
## Sending Events to Stiddle using Zapier
In the example below, we’ll explain how to send events to Stiddle using Zapier. Specifically, this walkthrough shows how to send Facebook lead form submissions from ads into Stiddle for tracking and attribution. However, this same process can be used to send events and data from any Zapier integration.
[https://www.loom.com/share/0255c3dabb054c79a68dcc8ce12ee8ae](https://www.loom.com/share/0255c3dabb054c79a68dcc8ce12ee8ae)
If you have any questions, run into any issues, or want to request a new trigger or action, please reach out to support. [hello@stiddle.com](mailto:hello@stiddle.com)